Build your event schedule & sessions
Before you start
Open your event and go to Event Hub → Schedule/Session. You'll need Event admin access or above. A single event can hold several schedules, for example a main programme and a separate poster exhibition, each with its own sessions.
Steps
-
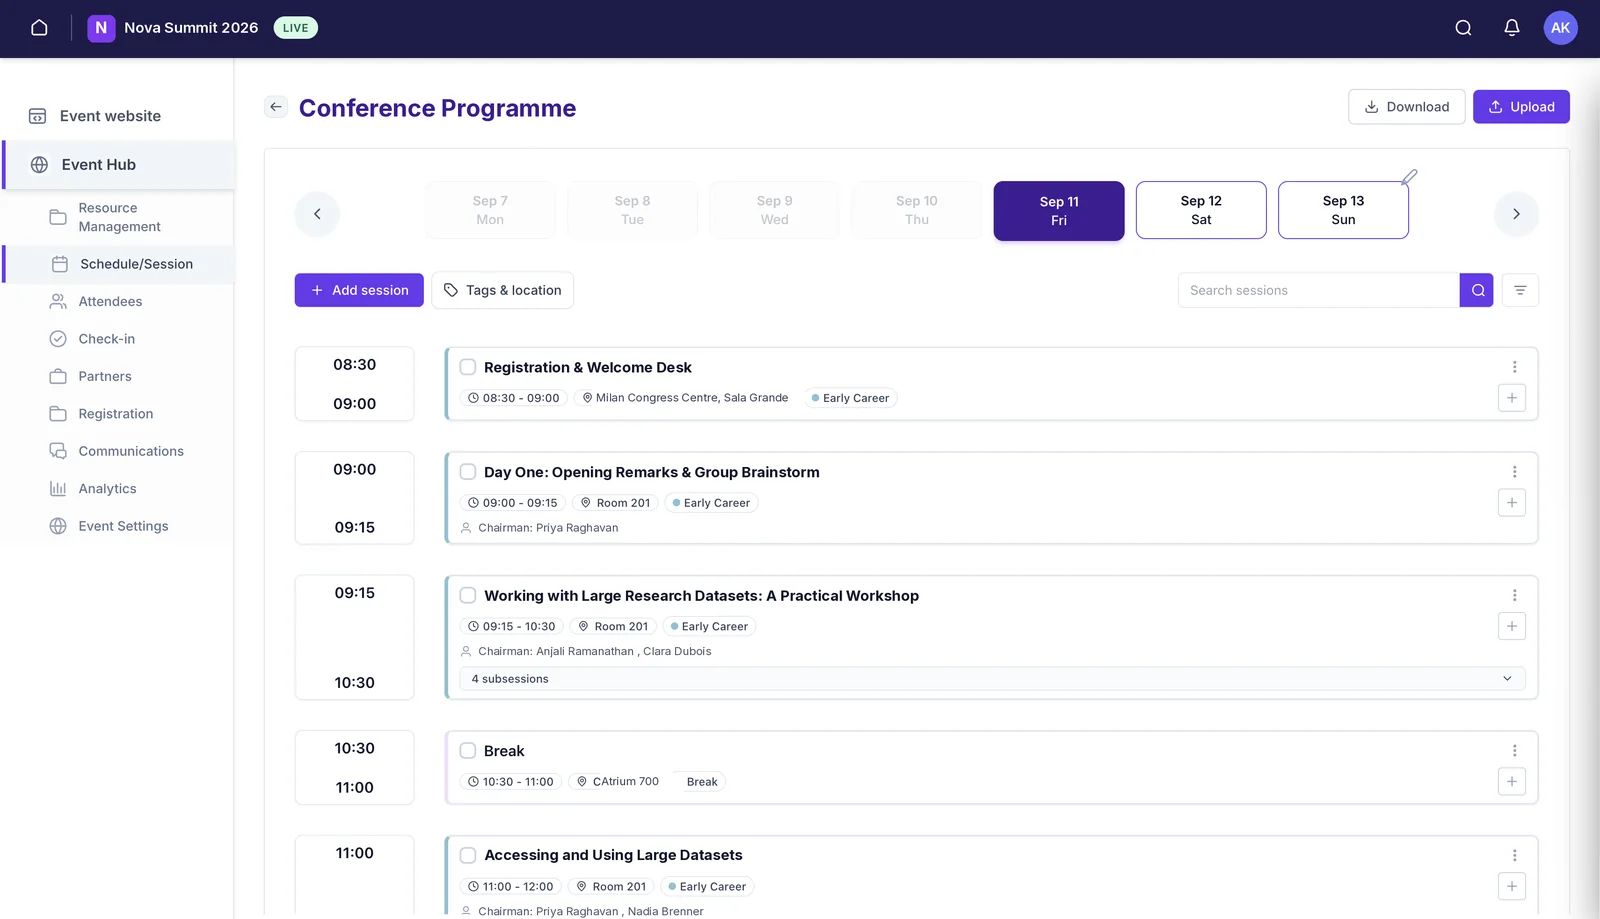 Open your scheduleFrom the Event Hub sidebar, click Schedule/Session, then Manage session on the schedule you want to work on.
 -
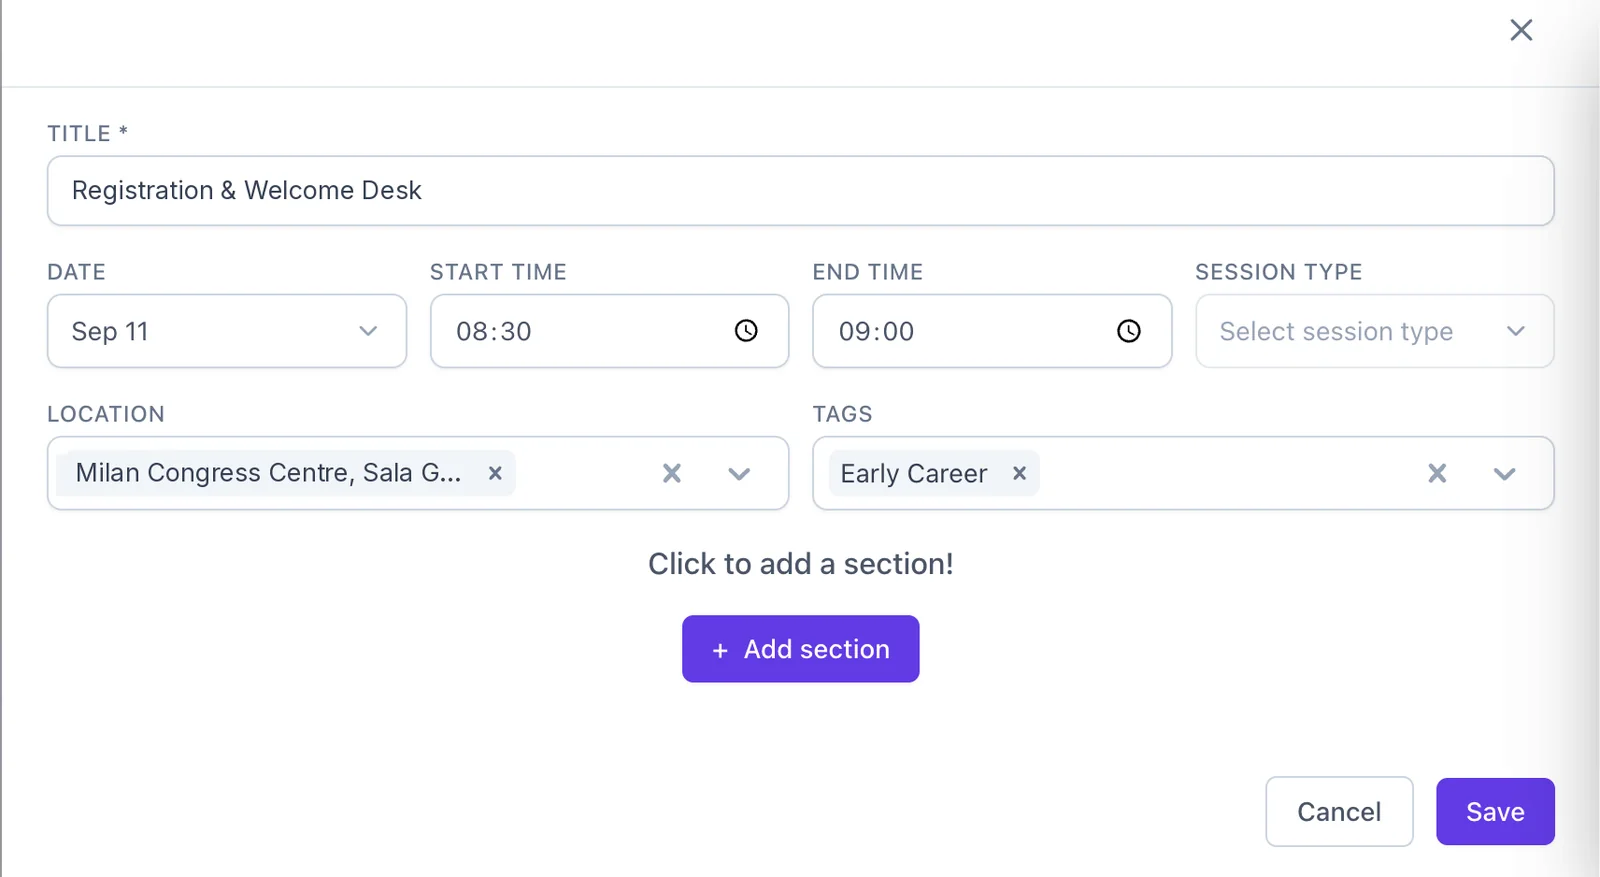 Add a sessionClick + Add session, then set the title, date, start and end time, and a location.
 -
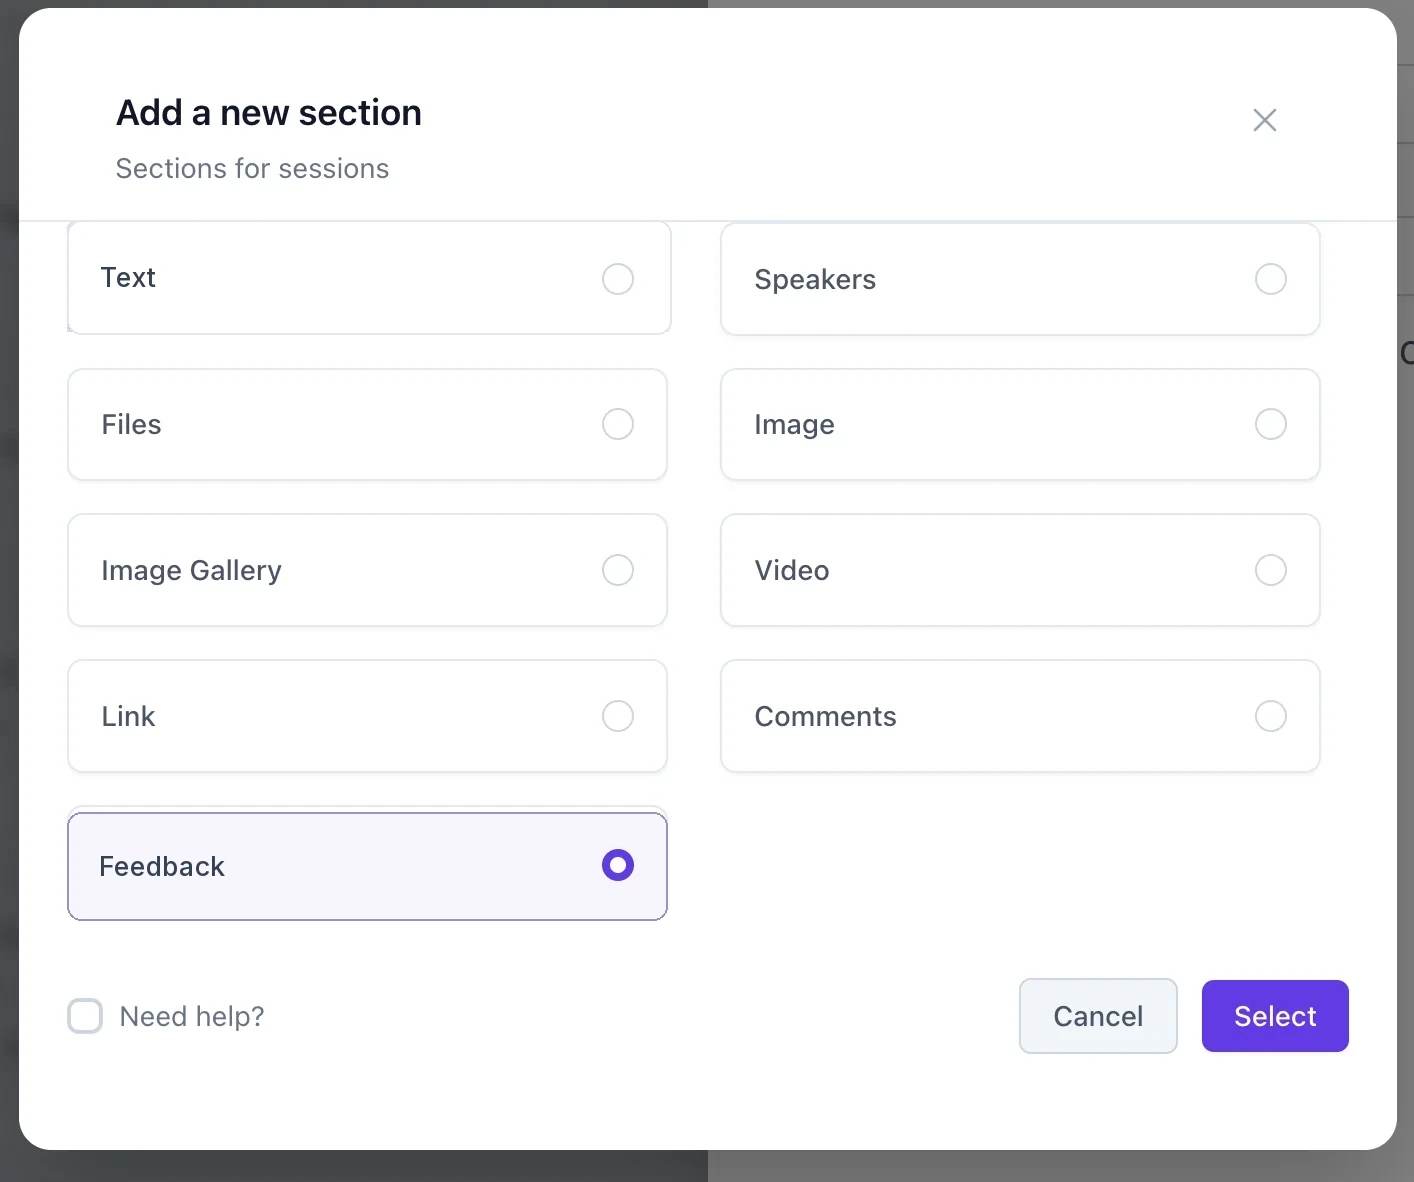 Build out the session with sectionsA session is more than a time slot — add sections for the abstract, speakers, files and feedback.
 -
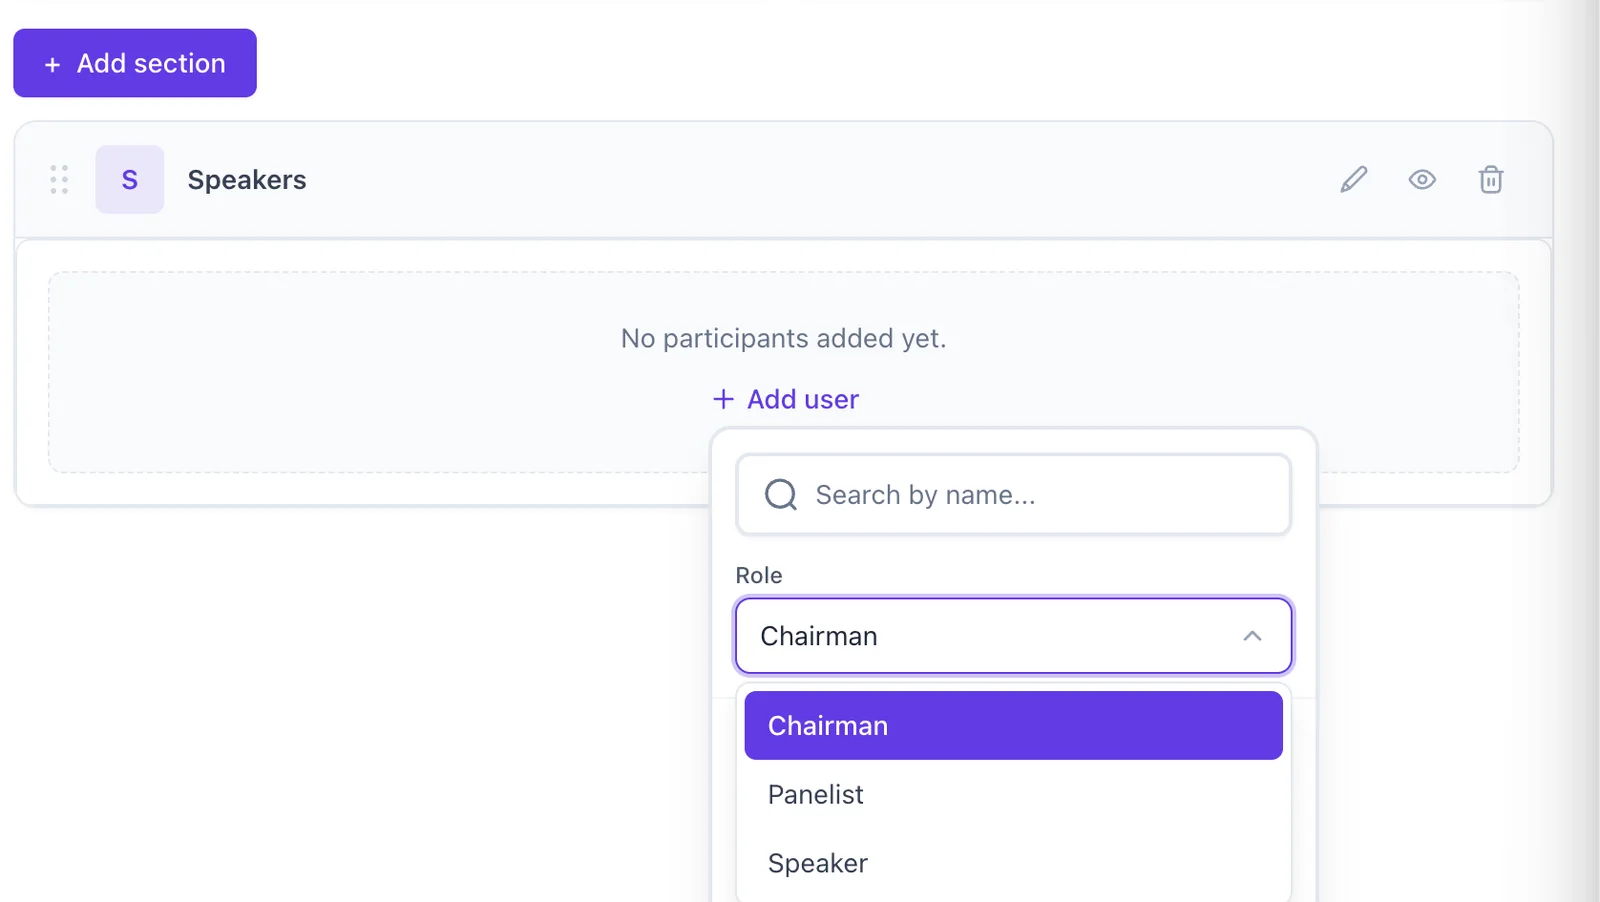 Assign speakersAdd a Speakers section, click + Add user, and search your event’s people by name.
 -
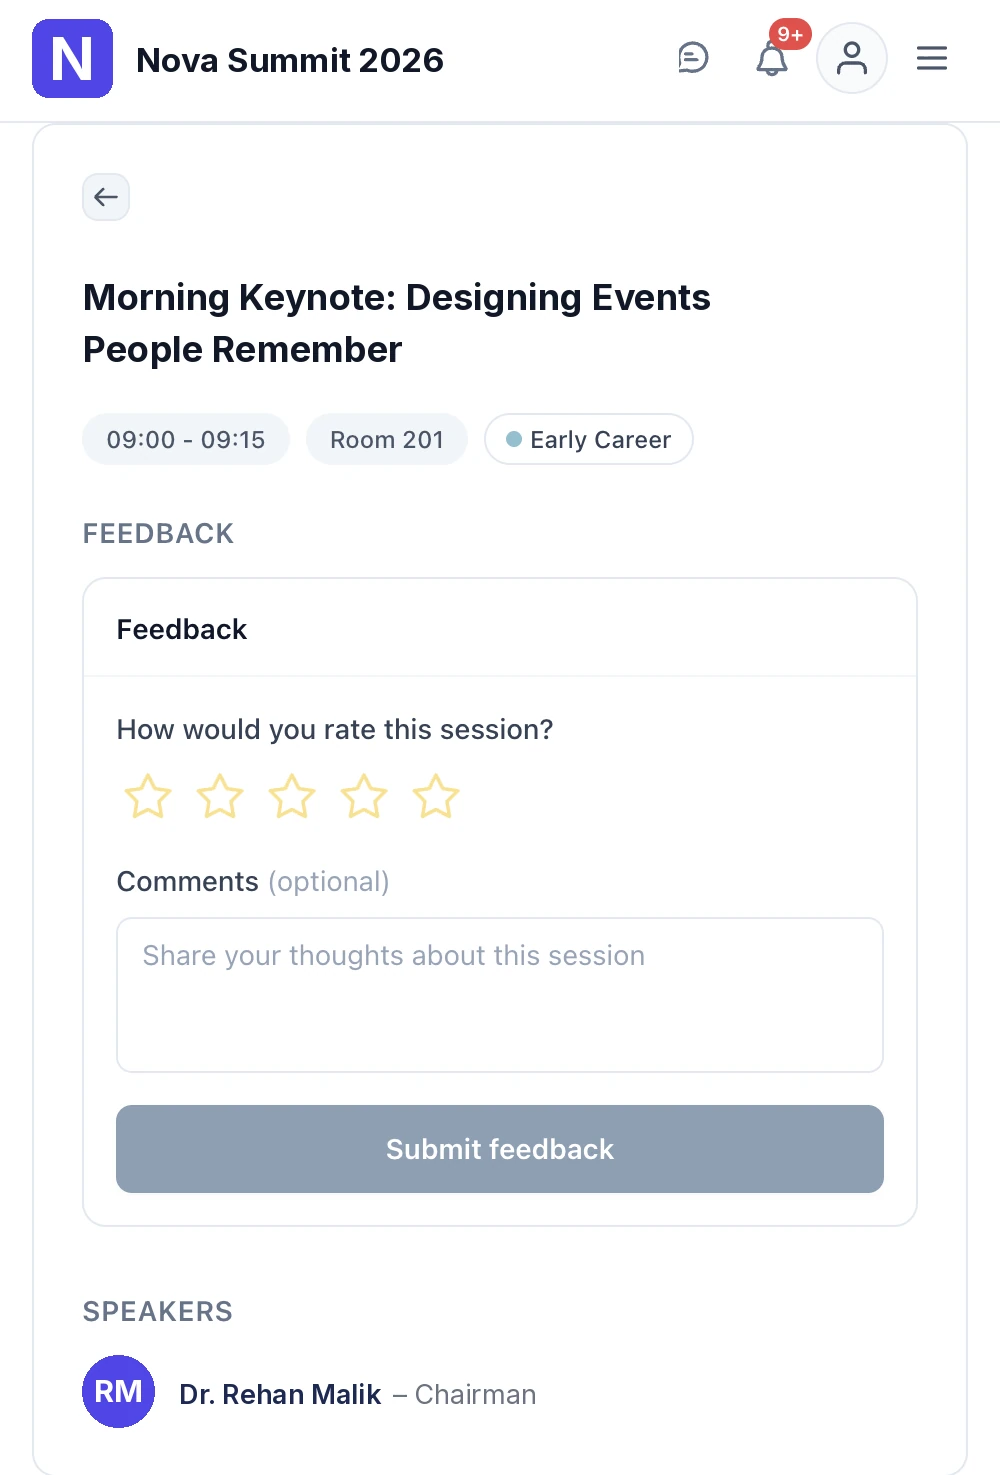 Ask for feedback on the sessionAdd a Feedback section — attendees get a five-star rating and an optional comment.
-
Open your schedule
From the Event Hub sidebar, click Schedule/Session, then Manage session on the schedule you want to work on. This shows that schedule as a day-by-day timeline: pick a day along the top, and the sessions for it run down the time rail.
-
Add a session
Click + Add session. Set the title, date, and start and end time, then pick a session type, one or more locations, and any tags. Tags are filters and a session can carry several, so Keynote, Clinical and Early Career can all apply at once, see Run parallel sessions & multiple programmes.
-
Build out the session with sections
A session is more than a time slot. Click + Add section and choose what to add: Text for an abstract or description, Speakers, Files for slides and papers, Image or Image Gallery, Video, Link, Comments, or Feedback. Drag sections by the handle to reorder them.
-
Assign speakers
Add a Speakers section, click + Add user, and search your event's people by name. Give each one a role, Chairman, Panelist, or Speaker, and they appear on the session card in the timeline and on the session page.
-
Ask for feedback on the session
Add a Feedback section and attendees get a five-star rating on the session, plus a comment box marked optional. The rating is what sends the response — the submit button stays inactive until a star is picked.
What the attendee sees on the session page. Responses land in Analytics → Feedback: average rating, the spread across one to five stars, your best-rated sessions, and every individual response with its comment. Note that responses are attributed to the named attendee — feedback is not anonymous. Full detail in Collect session feedback.
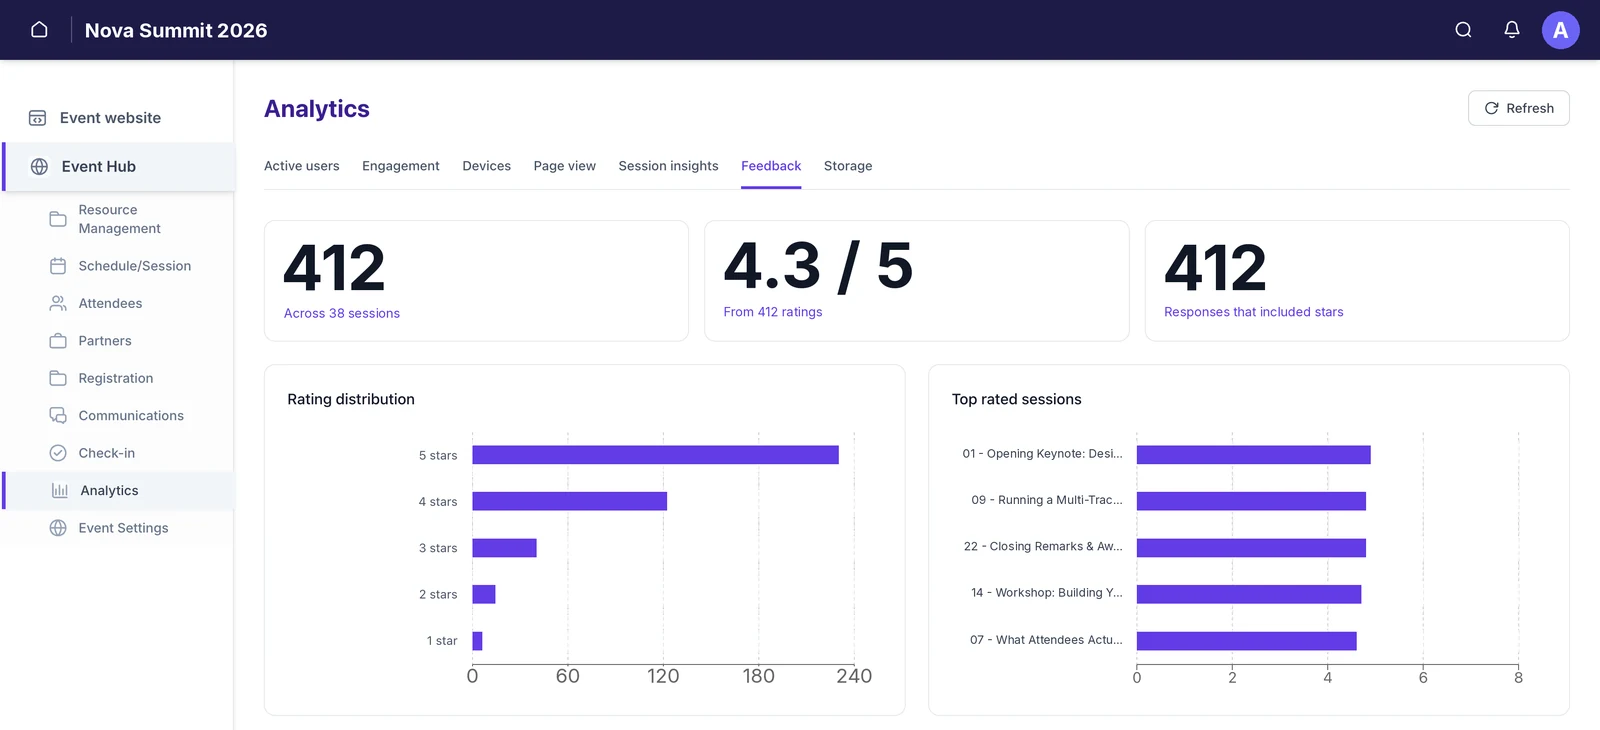
The Feedback tab in Analytics. -
Publish it to the website and app
Back on the Schedule list, tick Build Page for the schedule. That generates its page on the event website, and the same programme appears in the attendee app, where people can build a personal schedule from it.
Still need help? Reach our team and we'll get you sorted.
Contact support →