Create your first event
Before you start
You’ll need an Eventira account with a role that can create events. If you haven’t invited your team yet, you can do that afterwards, see Invite your team & set roles.
Steps
-
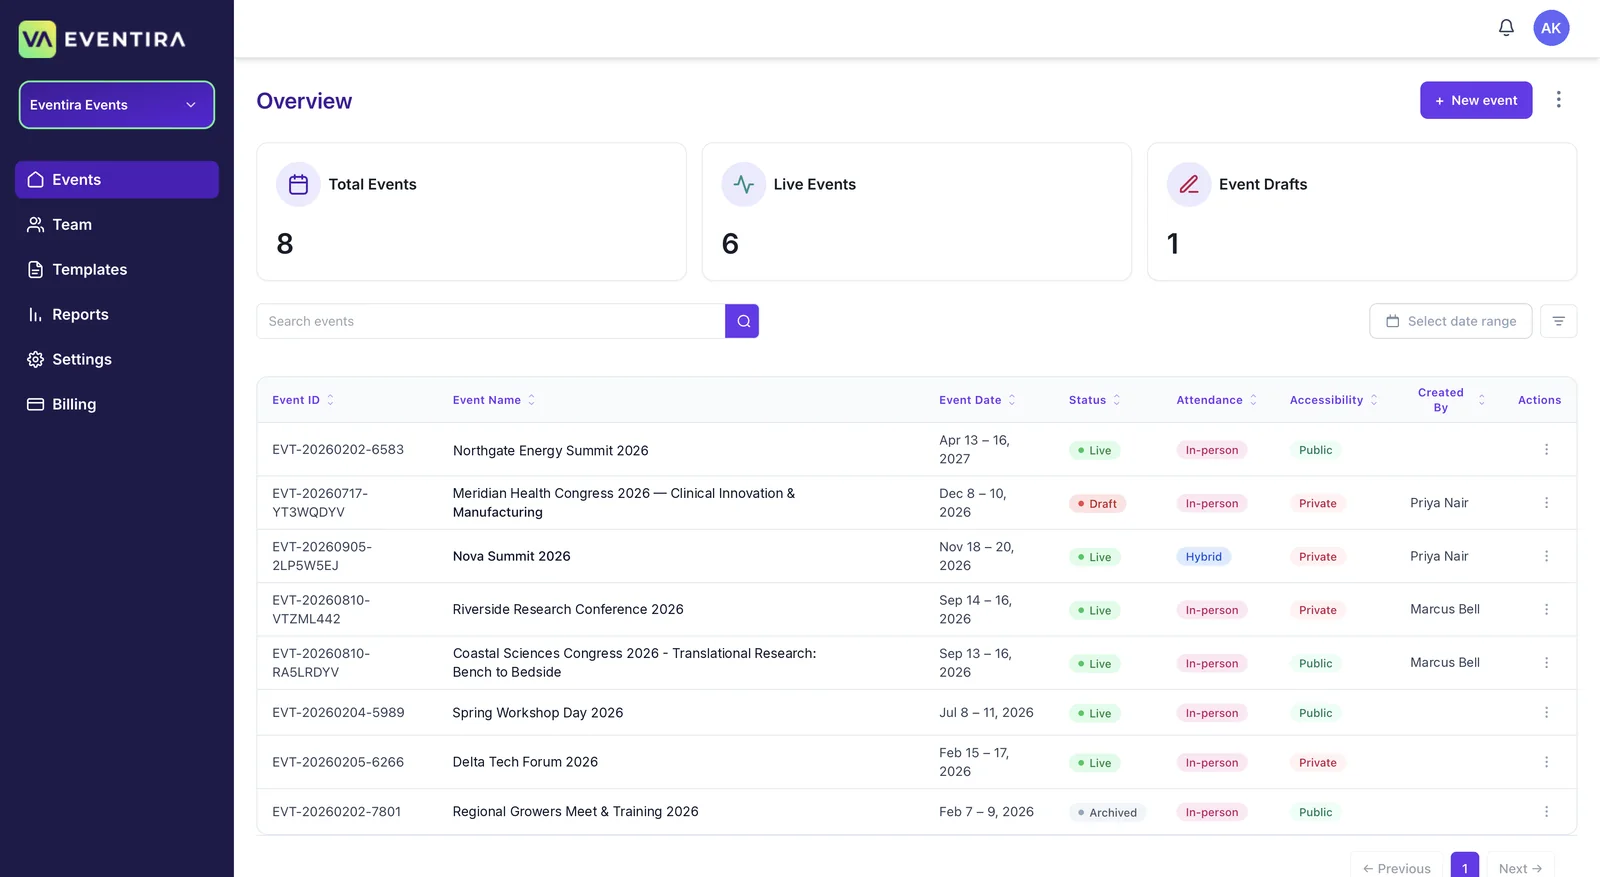 Start a new eventFrom Overview, click + New event in the top right.
 -
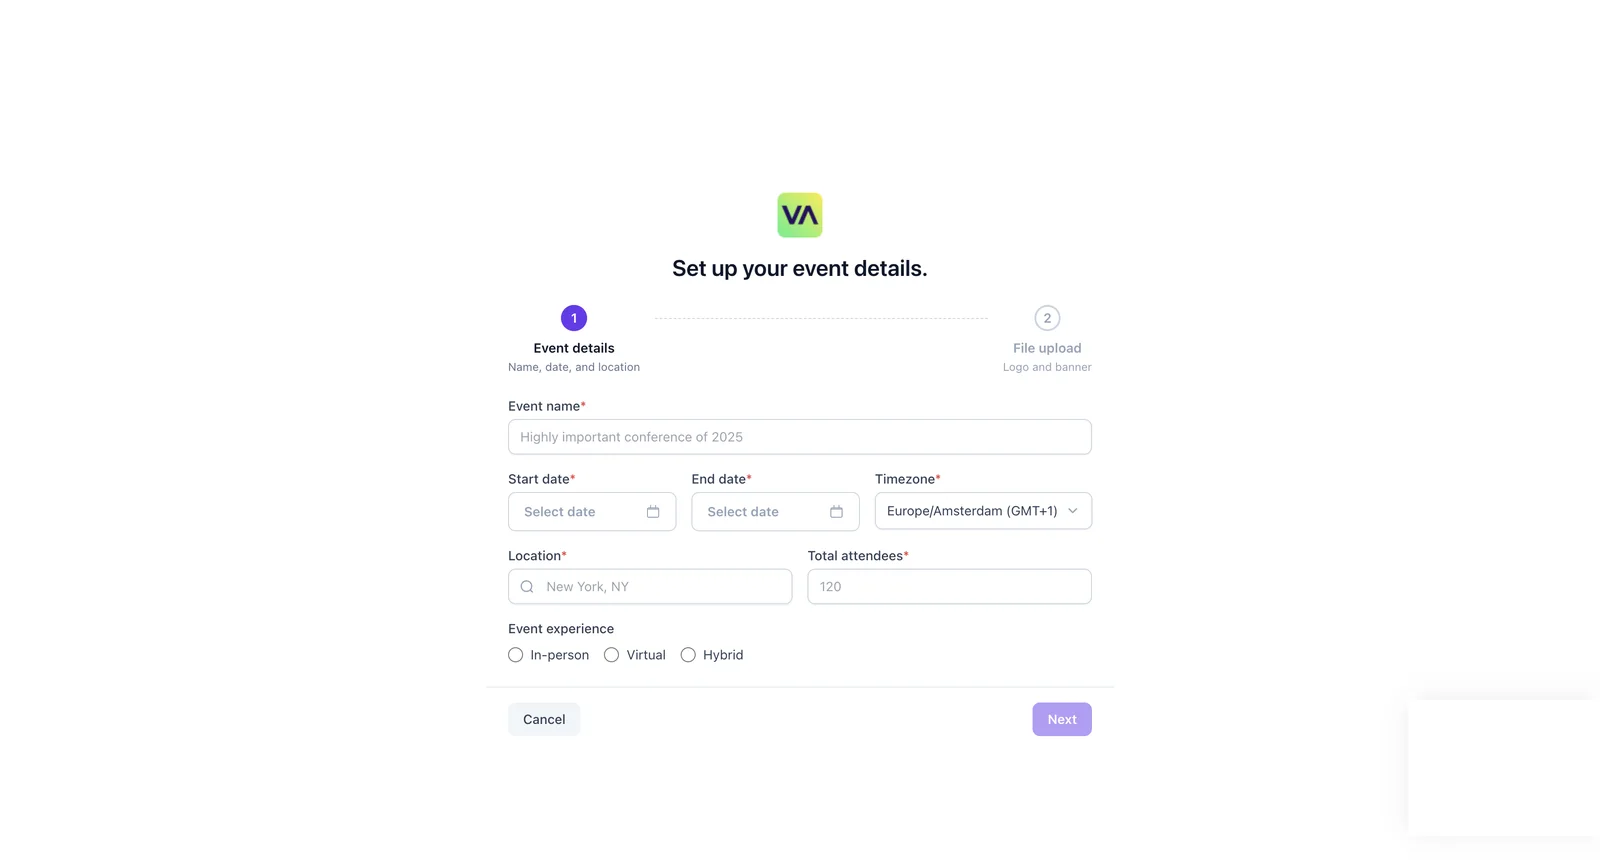 Fill in the detailsName, dates, timezone, location and expected attendees. Check the timezone — it sets every session time attendees see.
 -
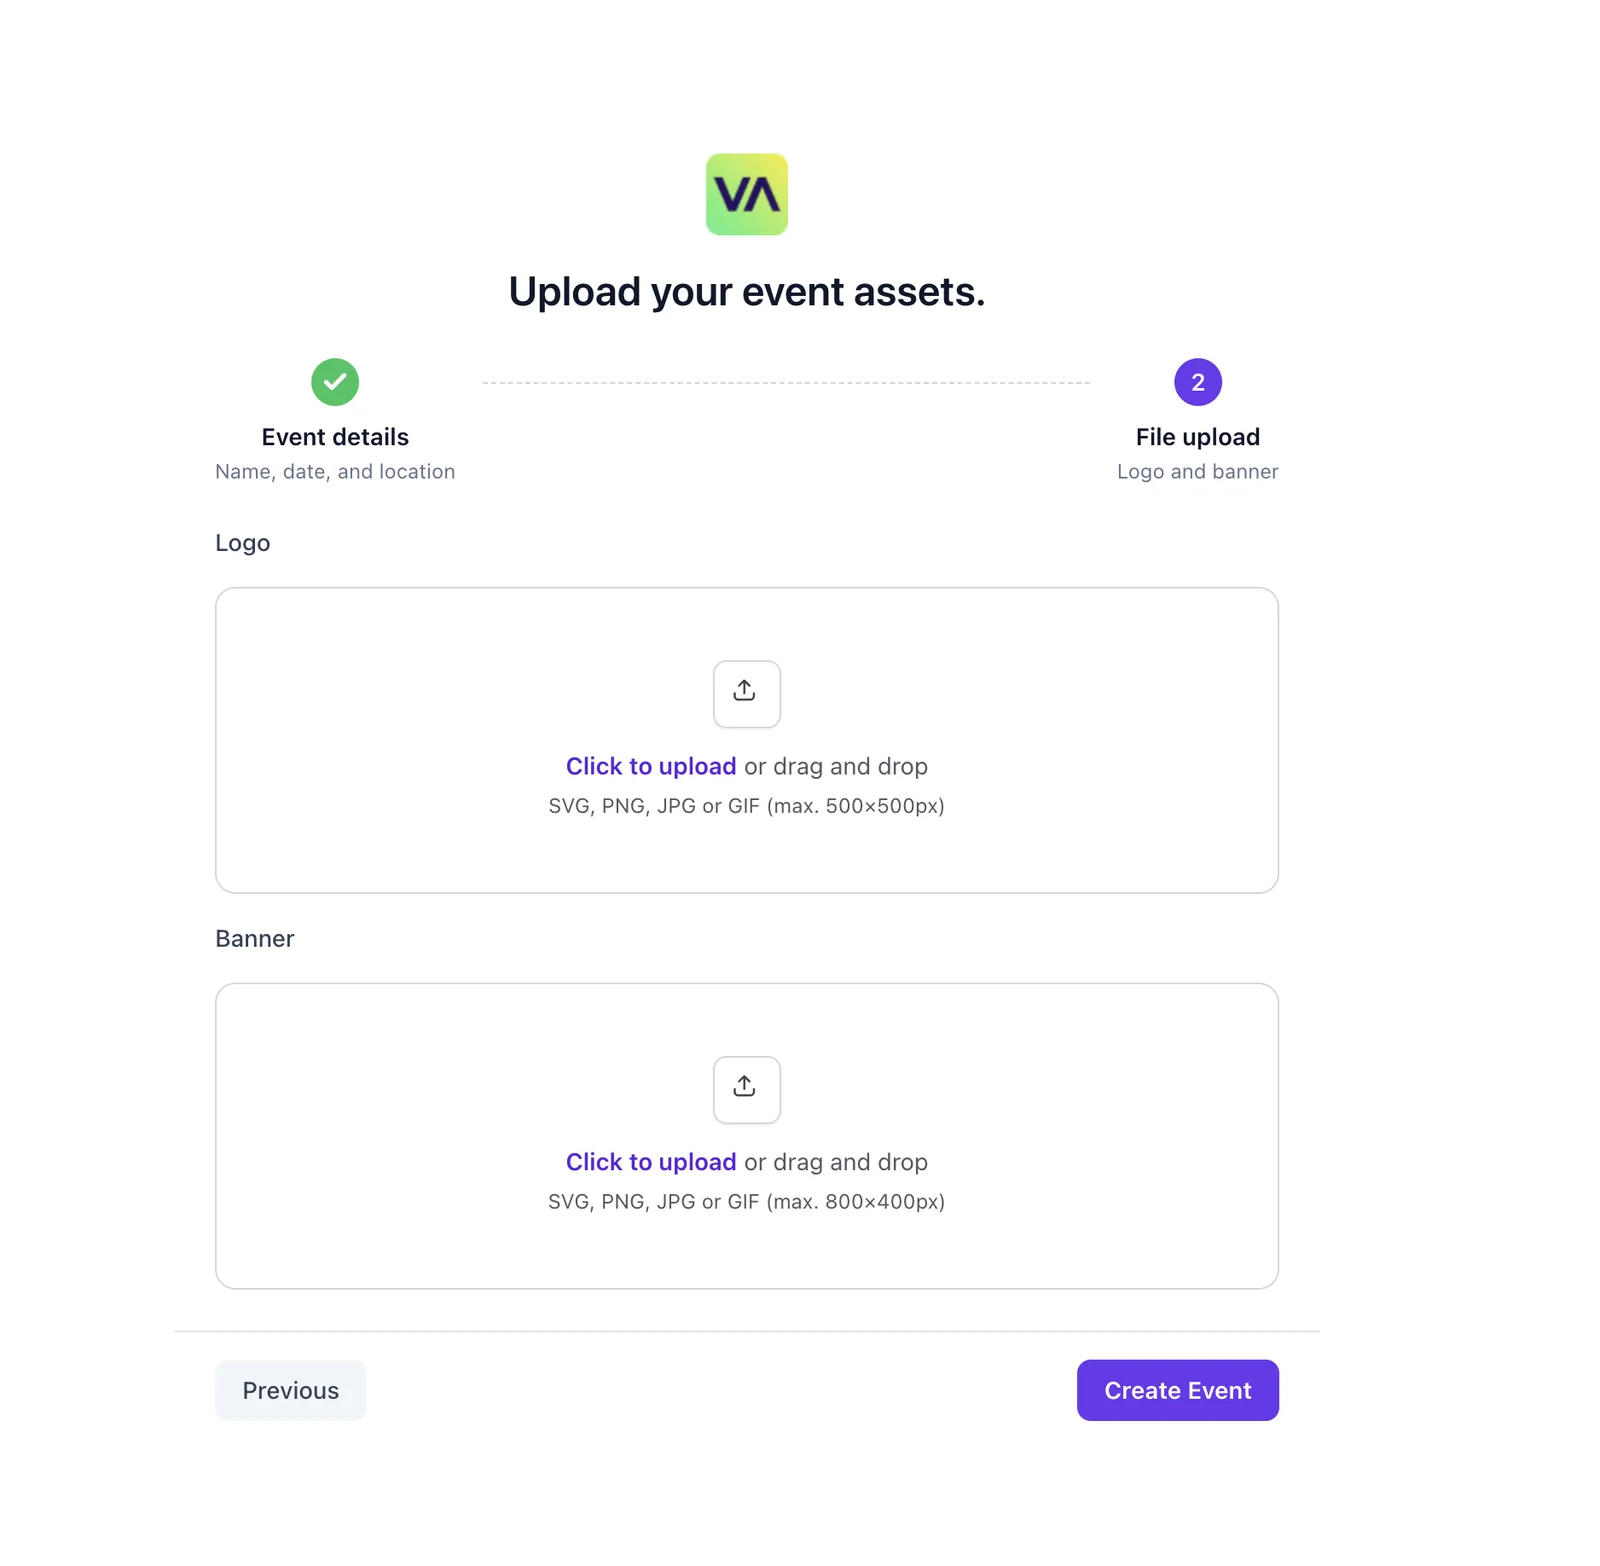 Add your logo and bannerLogo up to 500×500px, banner up to 800×400px. Then click Create Event.
 -
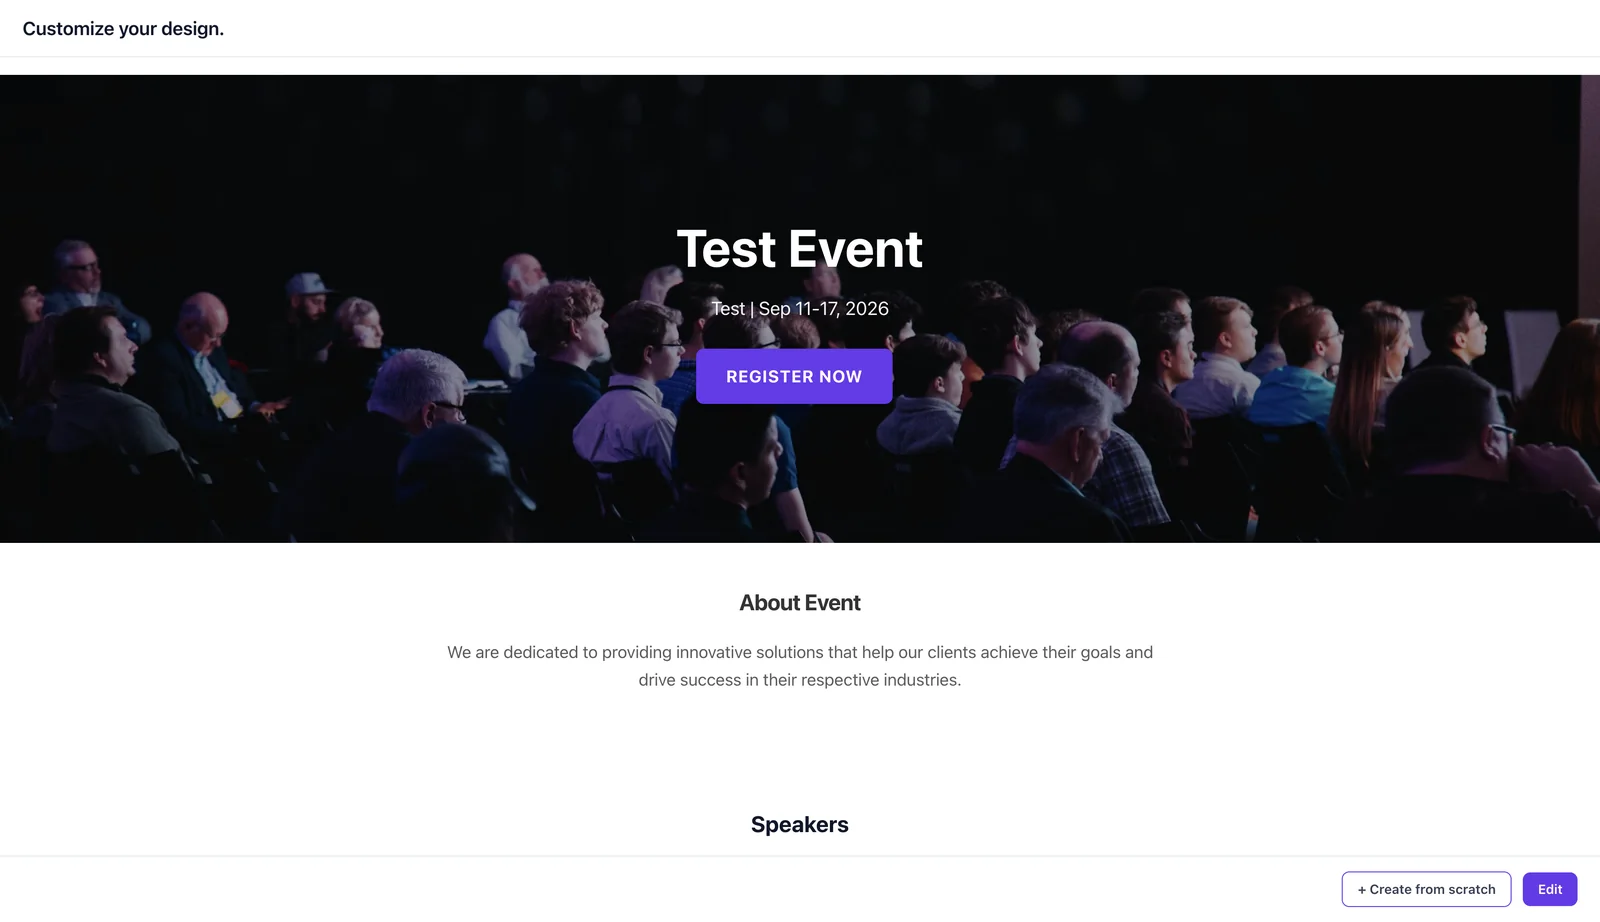 Choose how to build the siteEdit the ready-made design that already has your event in it, or start from a blank page.
 -
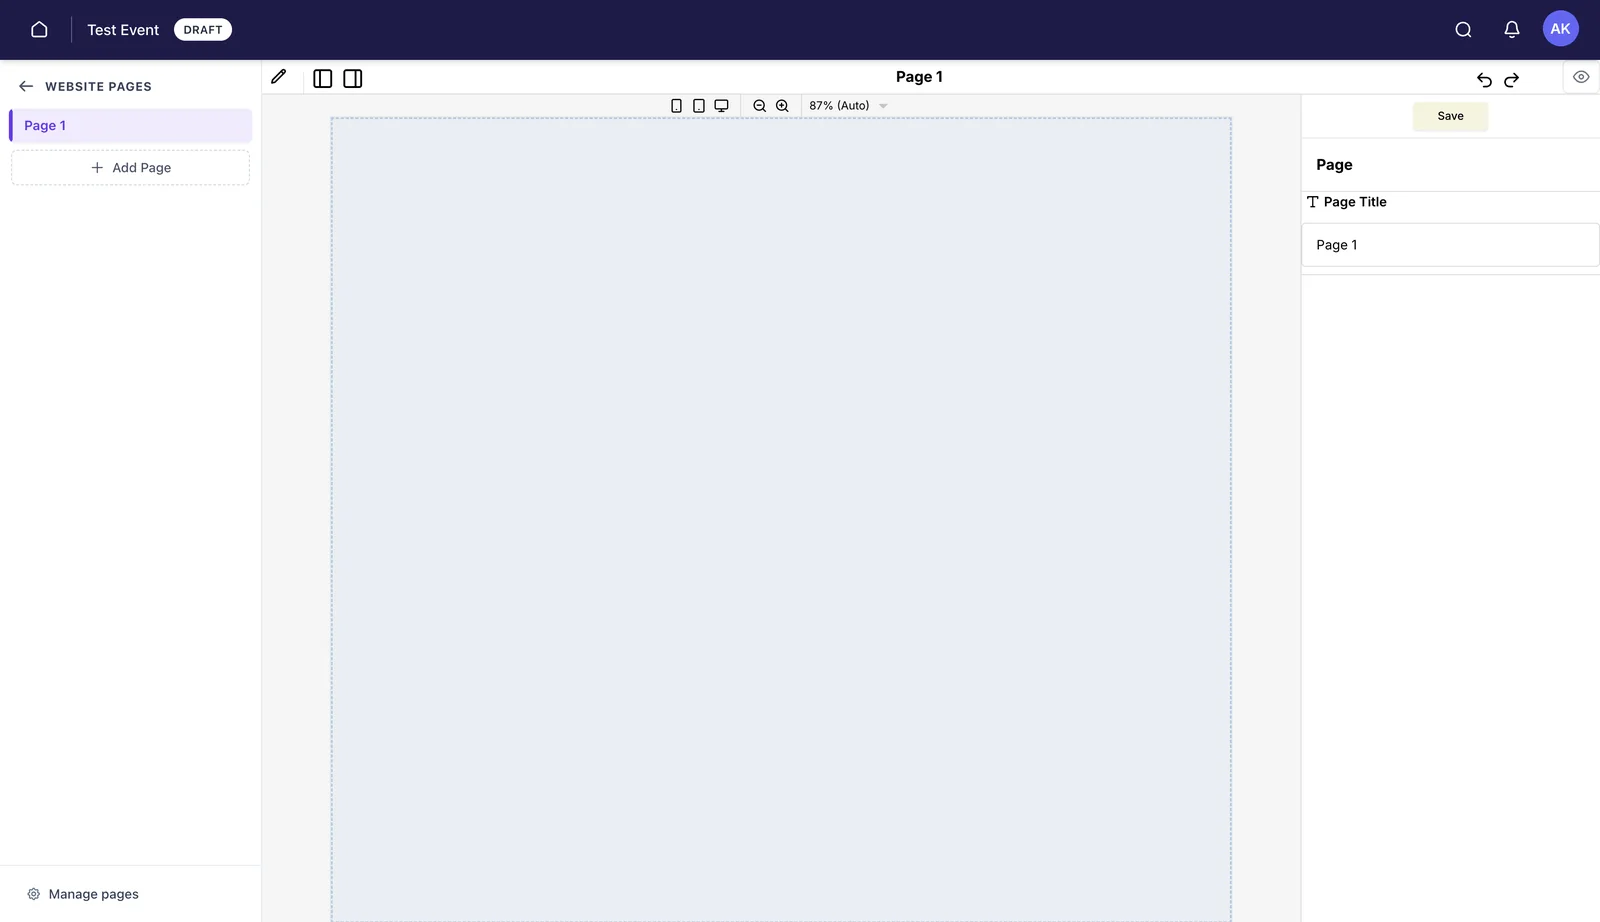 Open the page editorPages on the left, canvas in the middle, settings on the right. Add more with + Add Page.
 -
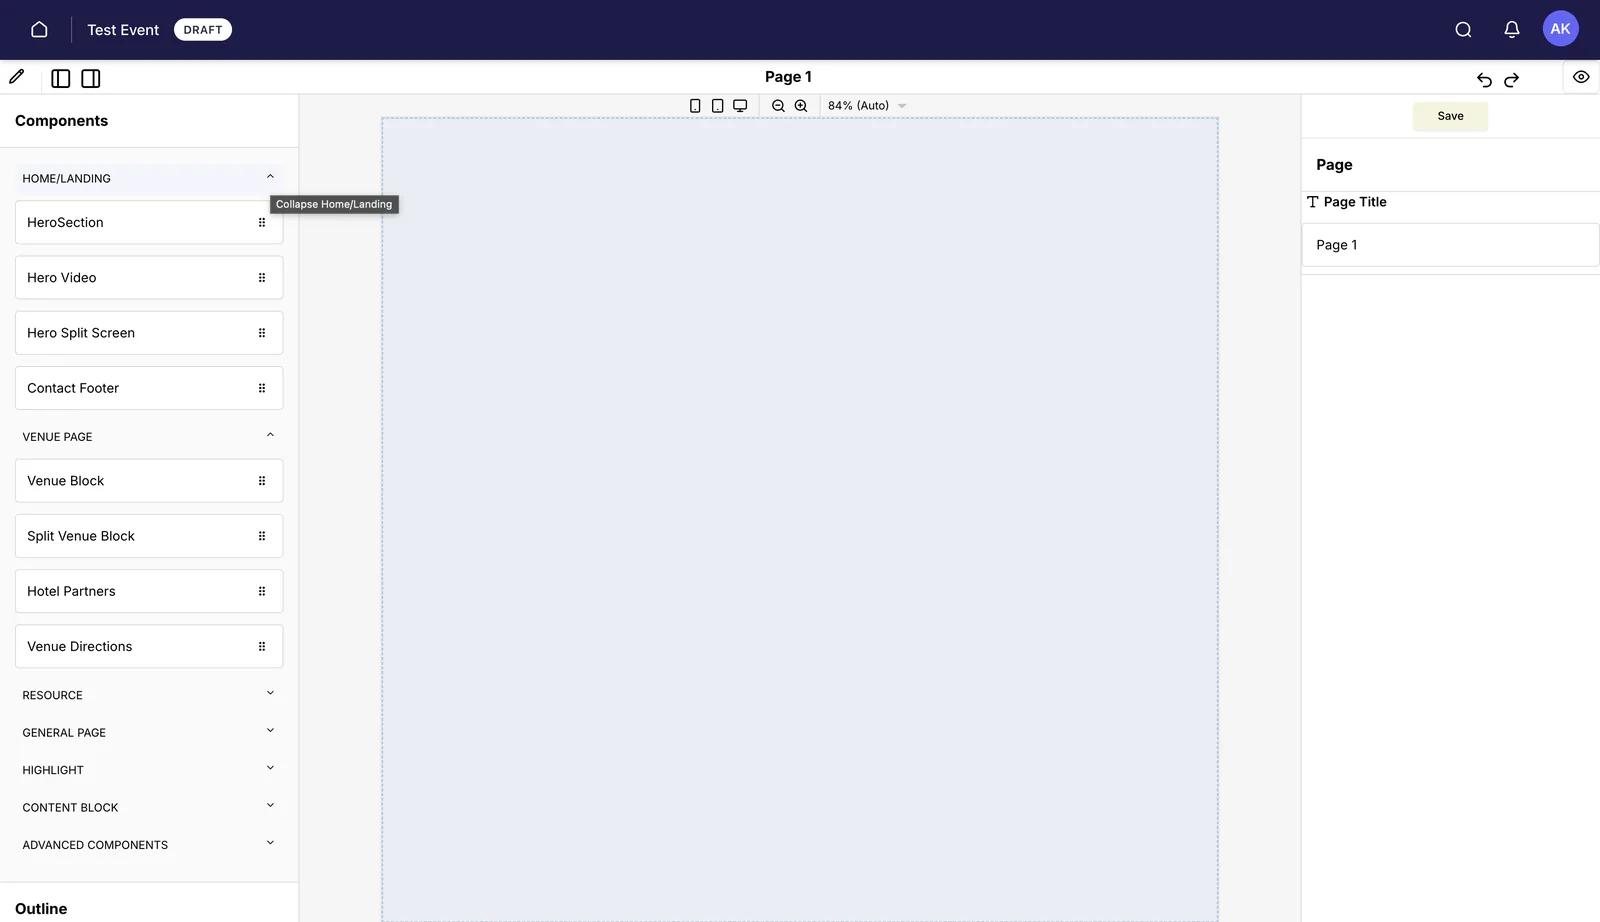 Drag in componentsComponents are grouped by the job they do, so you pick from a shortlist rather than a catalogue.
 -
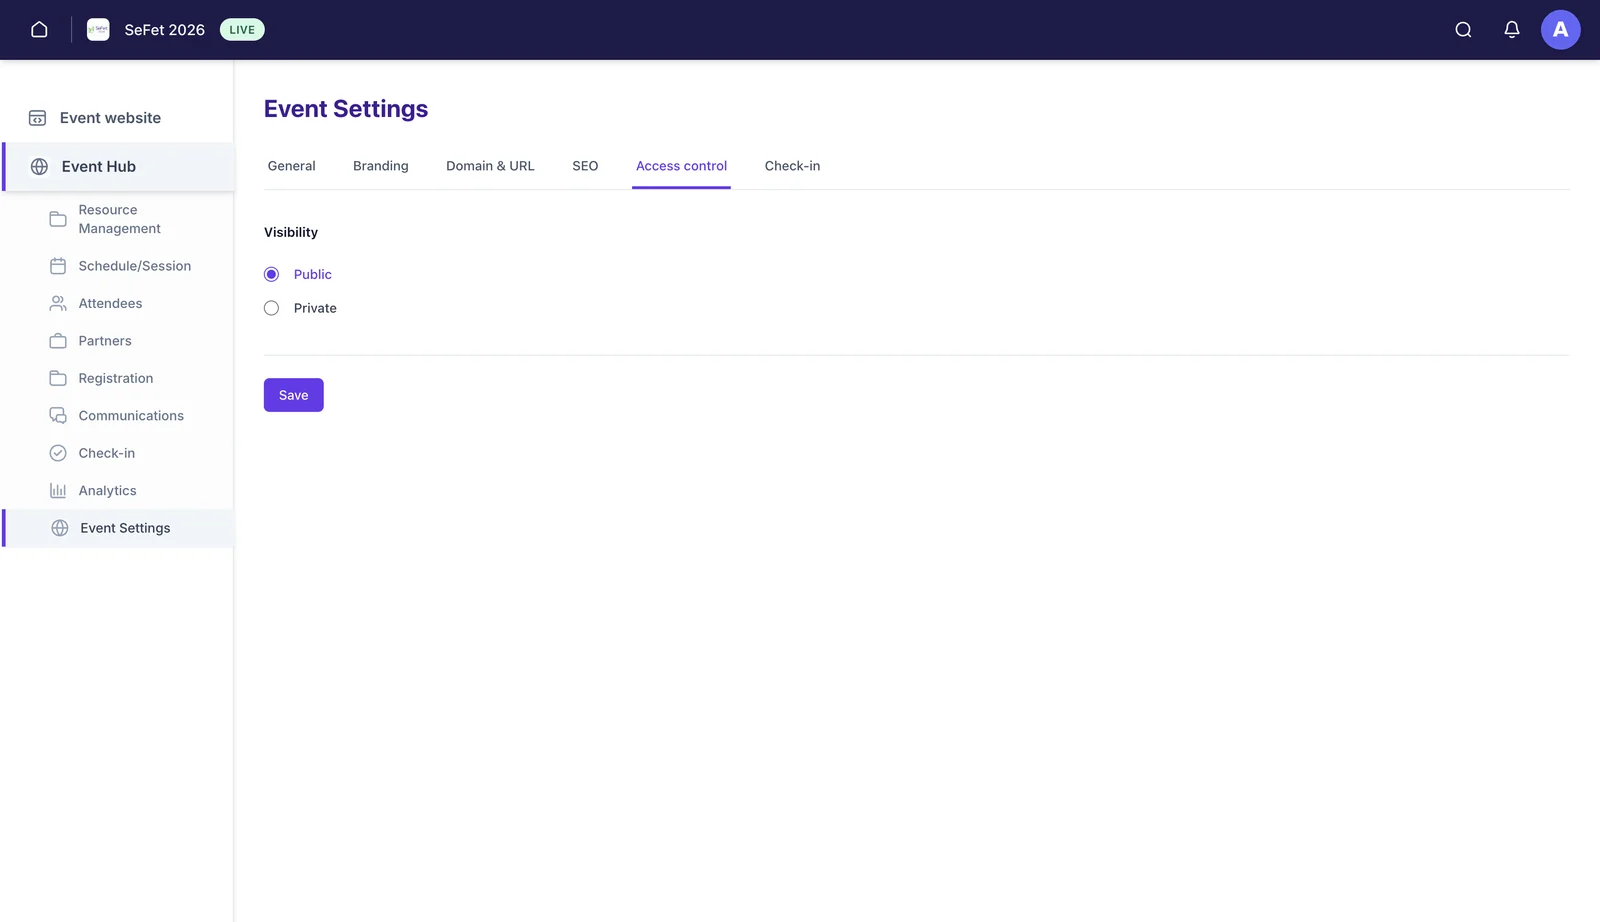 Set the event-wide accessibilityEvent Settings → Access control. Visibility is either Public or Private.
 -
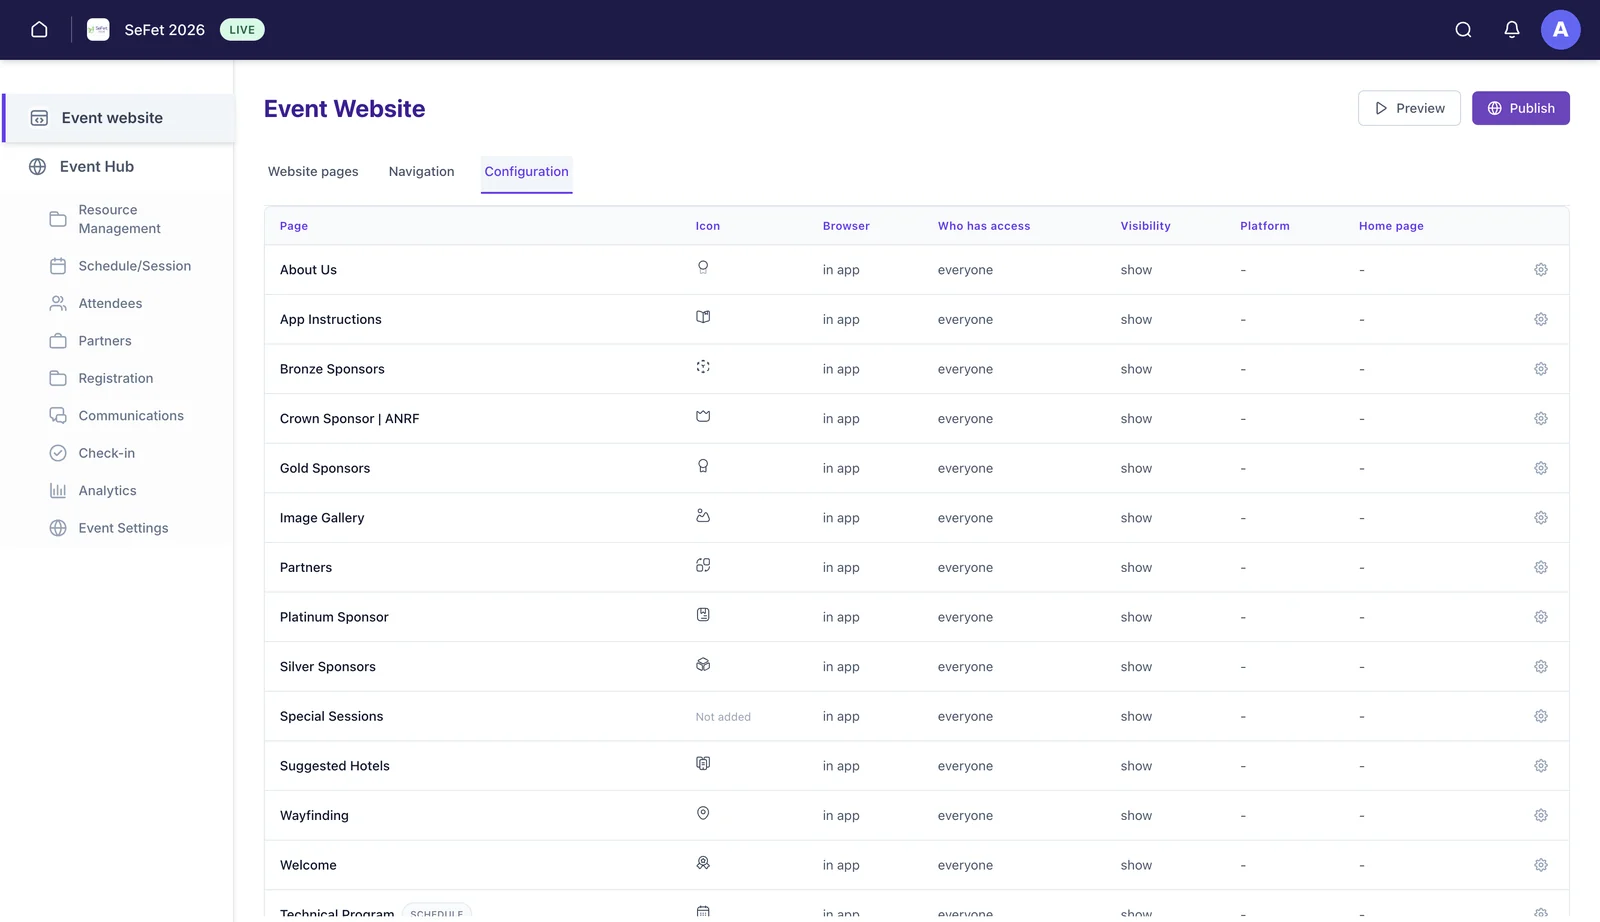 Gate individual pagesEvent website → Configuration. The Who has access column restricts a page to a group.
 -
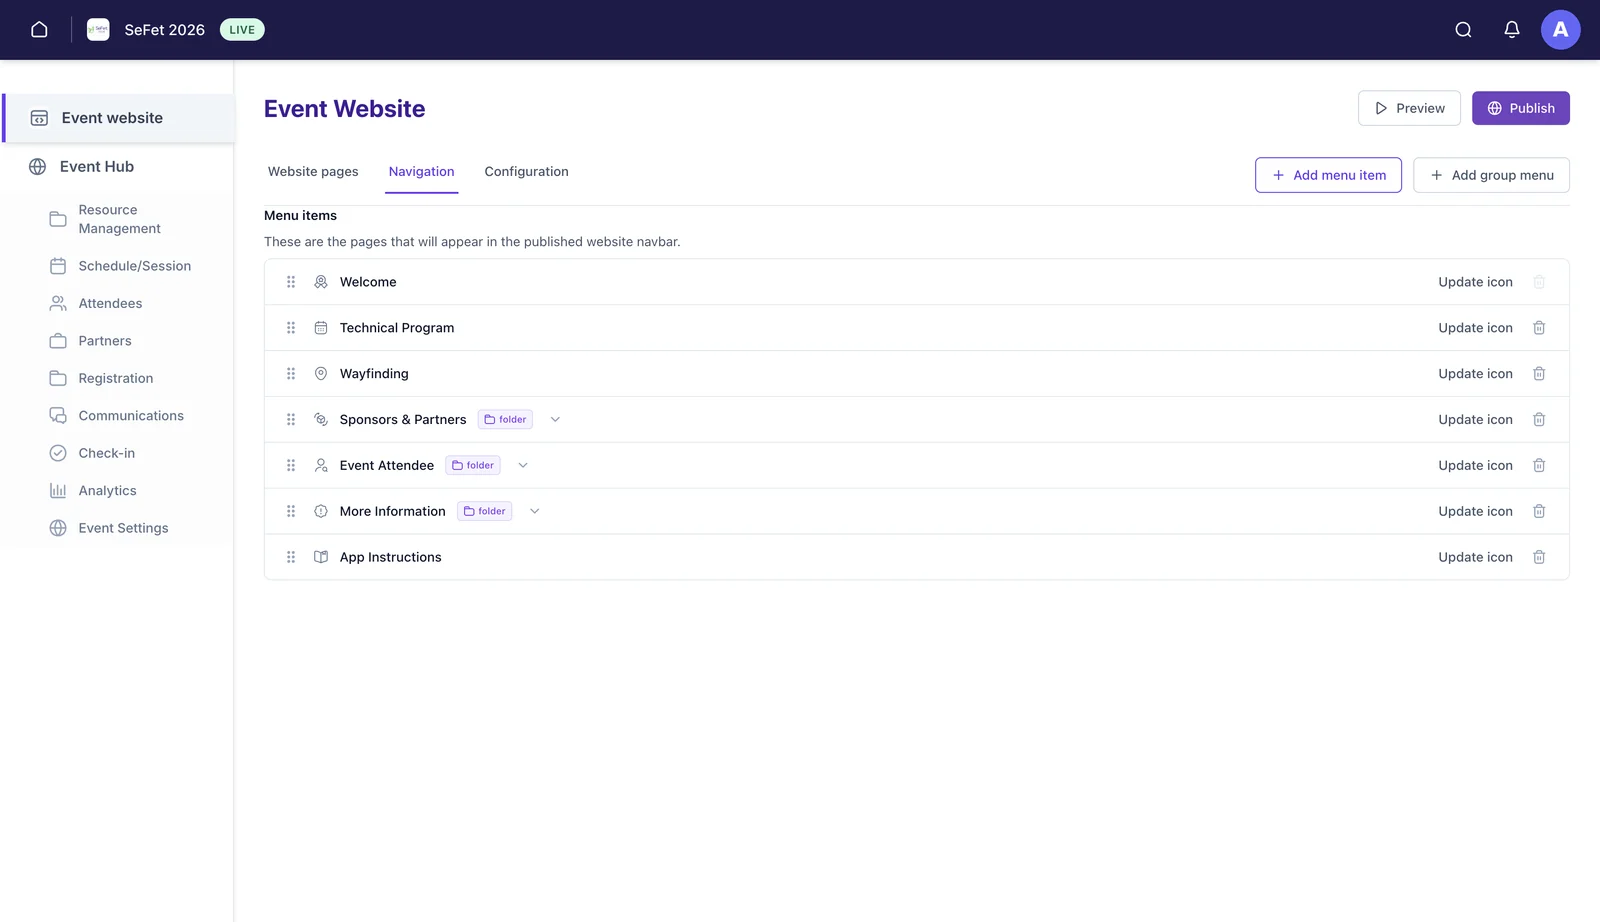 Set up the menuEvent website → Navigation decides which pages appear in the navbar, and in what order.
-
Open the dashboard and start a new event
Log in and you land on Overview: how many events you have, how many are live, how many are still drafts, and the full list below. Click + New event in the top right.
That table is worth knowing: Attendance shows whether each event is in-person, virtual or hybrid, and Accessibility shows whether it’s public or private. You can scan a whole portfolio for anything set the wrong way in one pass.
-
Fill in the event details
Step one of two. Give the event a name, a start and end date, a timezone, a location, and the total attendees you’re expecting. Then pick the event experience: in-person, virtual or hybrid.
Check the timezone before you invite anyone. It controls every session time and registration deadline shown on the website and in the app. It defaults to your own, which is rarely the venue’s. -
Upload your logo and banner
Step two. Drop in a logo (up to 500×500px) and a banner (up to 800×400px), as SVG, PNG, JPG or GIF. These are what make the event look like yours rather than like software, so it’s worth using the real assets rather than a placeholder you’ll forget to replace. Then click Create Event.
-
Choose how to build the site
Eventira shows you a ready-made design with your event’s name and dates already in it, a hero, an About section, Speakers and so on. From here you either Edit that design and change what you don’t like, or click + Create from scratch and start with an empty page.
Editing the ready-made design is the faster route for a first event. Starting from scratch makes sense when you already know the shape of the site you want.
-
Build the pages
Either way you end up in the page editor, with your pages down the left, the canvas in the middle, and the settings for whatever you’ve selected on the right. Add pages with + Add Page, and preview at phone, tablet and desktop width from the toolbar.
Pages are built by dragging components onto the canvas. They’re grouped by the job they do, so you’re picking from a shortlist rather than a catalogue:
- Home/Landing — HeroSection, Hero Video, Hero Split Screen, Contact Footer
Neither toolbar labels its icons. The icon key in Add & manage your event website pages says what each one does — the pencil is the one people miss, since it opens the editing tools for whatever you have selected.
- Venue page — Venue Block, Split Venue Block, Hotel Partners, Venue Directions
- Resource, General page, Highlight, Content block and Advanced components for everything else
See Add & manage your event website pages for working with pages in depth.
- Home/Landing — HeroSection, Hero Video, Hero Split Screen, Contact Footer
-
Set the event-wide accessibility
There are two separate access controls, and mixing them up is the usual cause of “why can’t my attendees see this?”. This is the first one. Go to Event Settings → Access control, where Visibility has exactly two values, and click Save.
That is the setting that’s awkward to change once invitations have gone out. Note there is no “gated” option here — a gated event is Public plus the per-page restrictions in the next step.
Three ways to set up access, from most open to most restricted. Only Public and Private are switches; gated pages are Public plus per-page restrictions. - Public. Discoverable from your landing page, with all content open. Attendees sign in only when they do something that records an action, saving a session, messaging, leaving feedback.
- Public with gated pages. Most of the event is open, but specific pages need a sign-in and a check that the person is allowed: the participant list, a members area, a closed or paid workshop. Access is granted by group.
- Private. Invite-only. You add attendee emails first, each person is invited at that address, and the event only appears in their My events once they sign up with it.
See How attendees sign in for what each one feels like from the attendee’s side.
-
Gate individual pages
That event-wide setting is the front door. The second control is per page, and it lives in a different place: Event website → Configuration. There’s a row for every page on your site.
The Who has access column is the one that gates a page. Leave it on everyone for open pages, and switch it to a group for the ones that shouldn’t be public — a board pack, a members-only page, a sponsor briefing. The same row also sets each page’s Visibility, whether it opens in the app or a browser, and which page is your home page.
ⓘThe two settings work together, not instead of each other. A public event can still have a handful of gated pages, and a private event is invite-only no matter what any individual page says. Set the event first, then the exceptions. -
Set up the menu
A page existing is not the same as a page being reachable. Pages appear in your attendee-facing menu only once you put them there, on the Event website → Navigation tab — that’s where you choose which pages show in the menu and in what order.
Use + Add menu item for a single page and + Add group menu to make a folder that holds several — that’s how a long site stays navigable, with sponsors tucked under one Sponsors & Partners entry instead of five separate ones. Drag the handles to reorder, and Update icon sets the icon each item shows.
A page that is built, saved and set to show but missing from the navigation is invisible to most attendees, and it’s one of the most common things people report as a bug. See Add & manage your event website pages for the full walk through of the three tabs.
-
Publish your event
When the site reads the way you want it, click Save and then Publish. One thing to know before you plan the announcement: publishing sends the event to us for approval, it does not put it live on the spot.
Publishing sends the event for review. Approval is what makes it visible to attendees. ⓘHow long approval takes. If you publish during working hours on a working day, we usually approve within 30 minutes. If you publish in the evening or over a weekend, we approve it on the next working day, as early in the day as we can.It is a quick check that the event is complete and nothing is obviously broken, not a redesign or an edit of your content. You will not normally hear from us unless something needs your attention.
So give yourself a little headroom: send the invitation email or post the link after the event shows as live, not the moment you hit Publish. And if you are working to a hard announcement time, publish the working day before rather than an hour ahead.
If it is approved and attendees still cannot see something, work through Fix: my event website won’t publish — the usual causes are a page hidden, gated to a group, missing from the navigation, or a programme, group or partner page whose Build Page step was never done.
Building pages with code
Alongside the drag-and-drop components, a page can be built from inline code. That matters more than it sounds. You can have an AI assistant write a page for you, a sponsor prospectus, a long call for papers, a detailed travel guide, and drop the result straight in instead of rebuilding it block by block.
It’s the right tool for pages that are mostly words and structure. For anything that needs to match the rest of the site visually, the components will get you there faster and stay consistent.
Would you rather we just built it?
If you have the content but not the time, we’ll set the event up for you: the site, the programme, speakers, sponsors, the lot. Send us what you have in whatever shape it’s in and we’ll build it out. It’s $200 per event ($150 on Pro and Premium), and complimentary for 2026 launch-year clients.
It tends to be worth it for a first event, when you’re learning the platform and the deadline isn’t moving. Get in touch and we’ll tell you what we need from you.
Still need help? Reach our team and we'll get you sorted.
Contact support →