Import attendees, speakers & sponsors in bulk
Before you start
You’ll need a role that can manage the event (Organizer, Team manager or Event admin, see Invite your team & set roles) and your list ready as a spreadsheet.
Steps
-
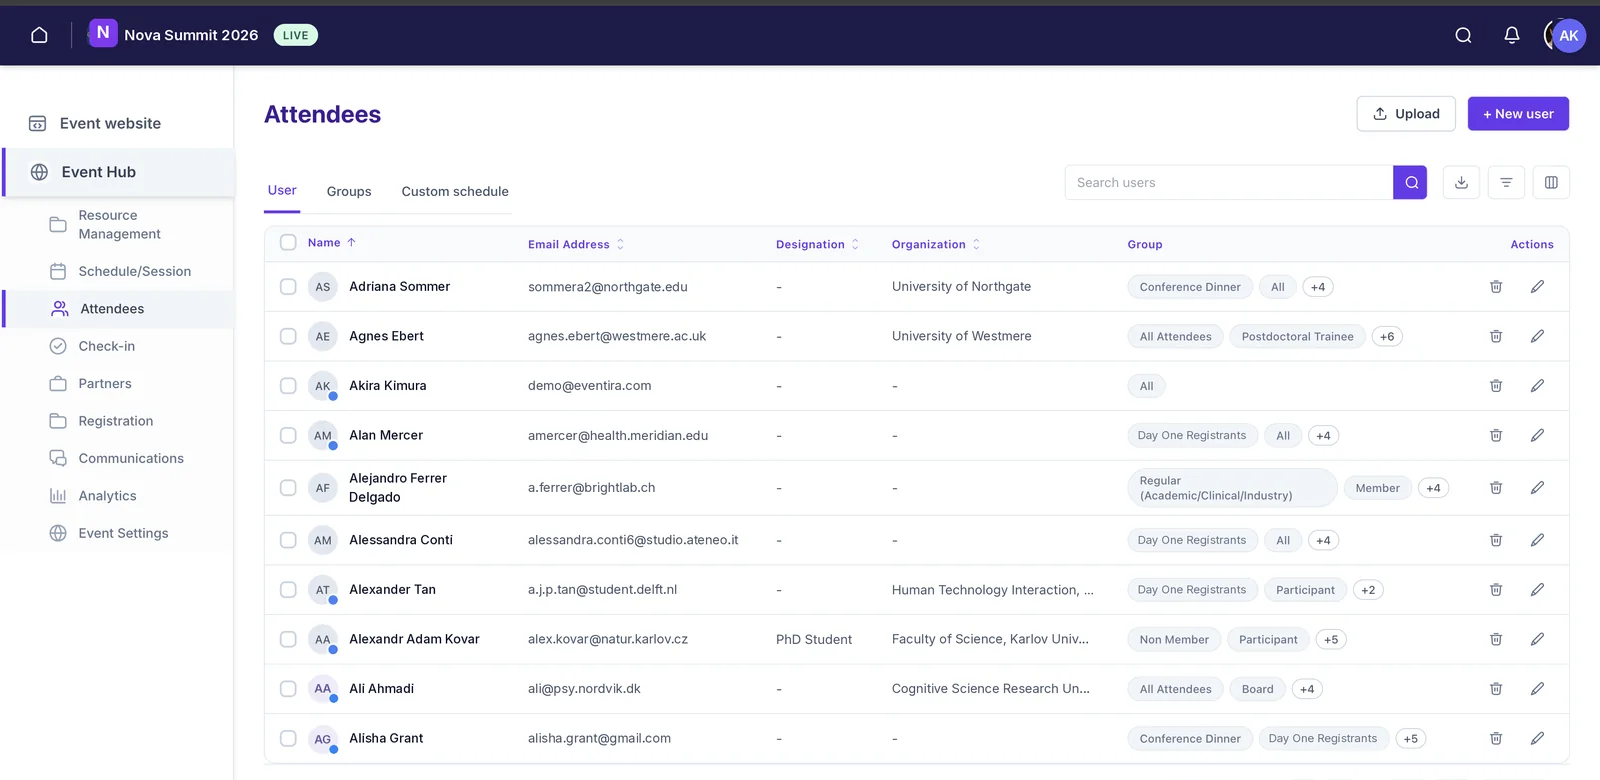 Open Attendees and choose UploadIn the Event Hub, open Attendees and click Upload to bring people in from the template.
 -
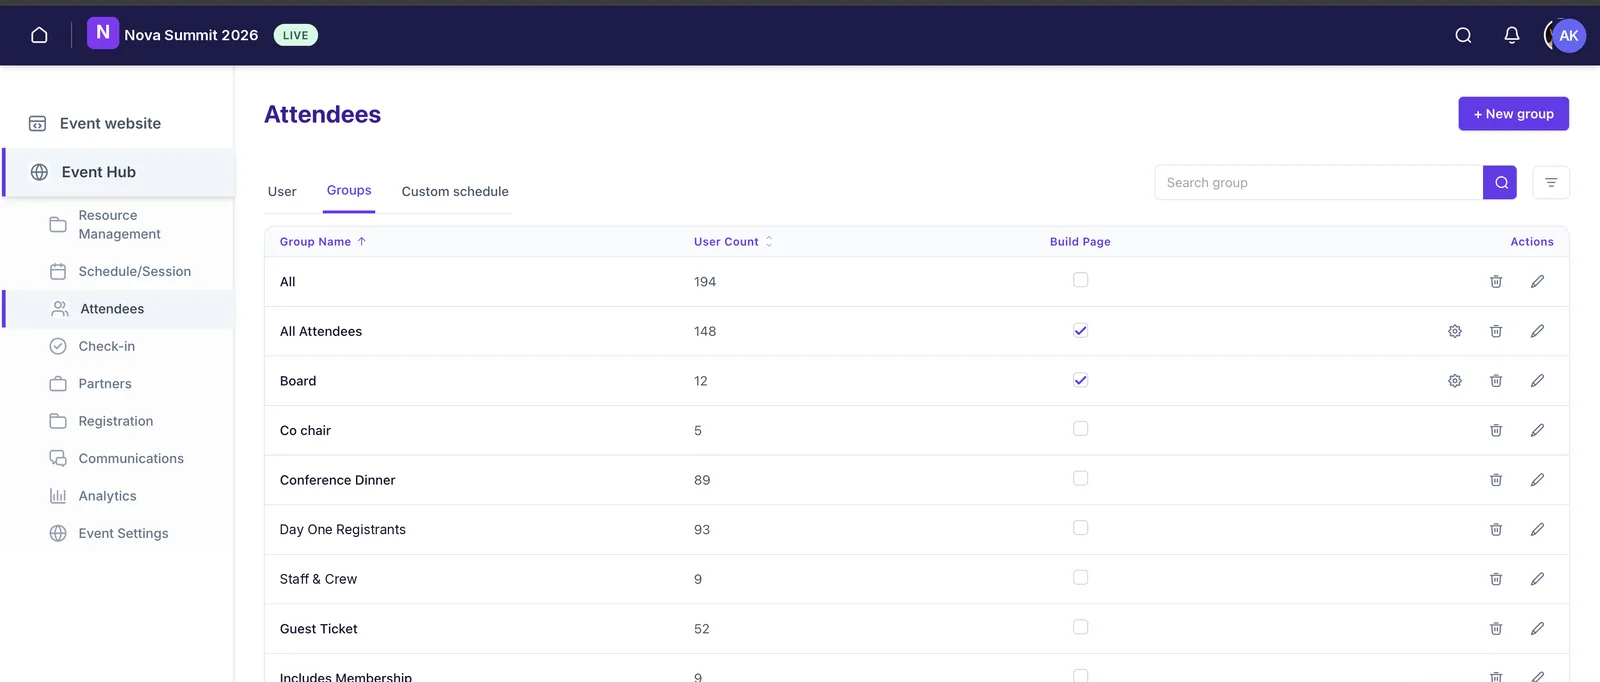 Sort people into groupsGroups are how you tell a board member from a day-one registrant, and how you decide who sees what.
 -
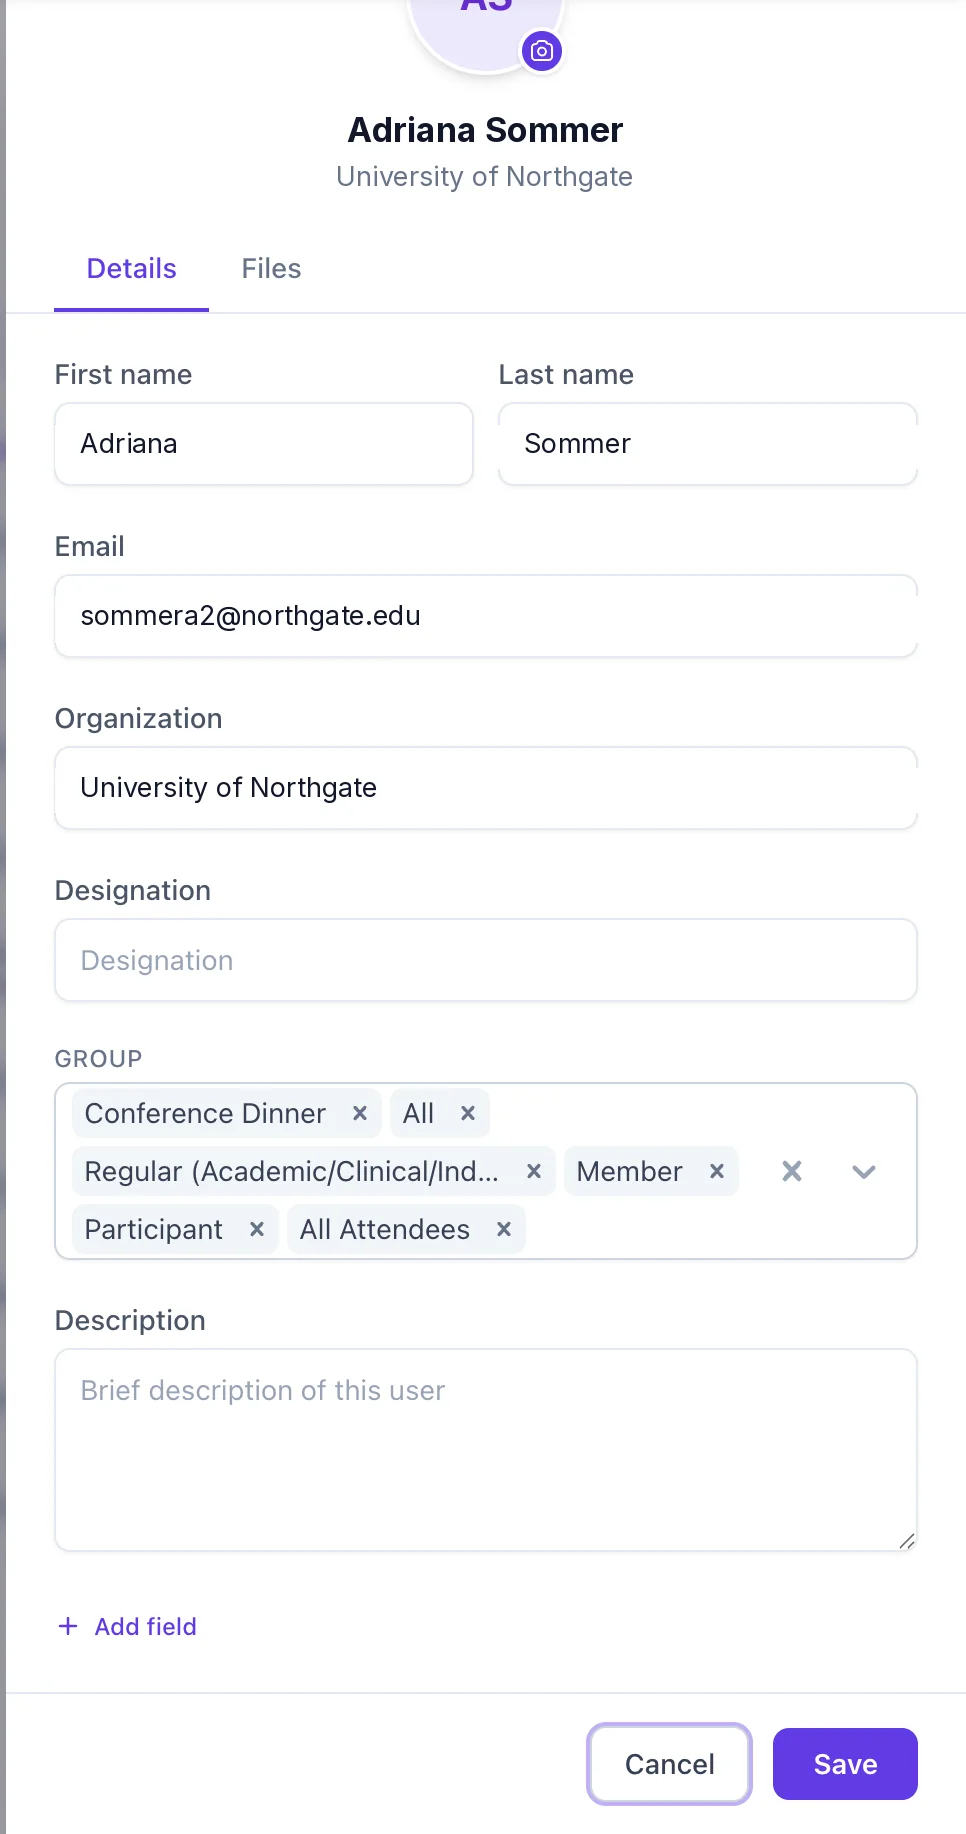 Fill in the details that matterOpen anyone with the pencil icon to edit their name, email, organisation, designation, groups and description.
-
Open Attendees and choose Upload
In the Event Hub, open Attendees. The User tab lists everyone at the event with their email, organisation and groups. Click Upload in the top right, or + New user if you’re only adding one person.
-
Download the template and fill it in
Download the template from the upload dialogue and add one row per person. Keep the header row exactly as it is. Leave optional cells blank if you don’t have them yet, every record stays editable after import.
-
Upload the file
Drag the completed file onto the upload area and attach it. Your people appear in the User tab, and you can search, filter by group, and choose which columns to show using the controls above the table.
-
Sort people into groups
Groups are how you tell a board member from a day-one registrant, and how you decide who sees what. Open the Groups tab to create them and see how many people are in each. Select rows in the User tab and use Add to group to move several people at once.
-
Fill in the details that matter
Open anyone with the pencil icon to edit their name, email, organisation, designation, groups and description. If the standard fields don’t cover what you need, + Add field lets you add your own.
You don’t have to fill in everything. Profiles sync from the attendee side: when someone completes their own profile in the app, their bio, photo, organisation and networking interests flow back into the record you see here.
Sharing files with an attendee
Every person also has a Files tab, a private vault shared between them and your team. It’s the right place for documents that shouldn’t sit in a public folder: visa invitation letters, accepted papers, signed forms. See Share private files with an attendee.
Still need help? Reach our team and we'll get you sorted.
Contact support →