Groups: control access, networking & comms
Why groups do so much work
Every person at your event lives in one list under Event Hub → Attendees. A delegate, a keynote speaker, a board member and a volunteer are all rows in the same table. What tells them apart, and what the platform acts on, is the groups they belong to.
Someone can be in as many groups as makes sense. A person might be in All Attendees, Board and Conference Dinner at once: listed publicly, able to open board papers, and expected at dinner on the Friday.
The four jobs a group does
-
Networking: who appears in the attendee list
Groups build the people pages attendees browse in the app. Tick Build Page on a group and it gets its own list, so Speakers, Board and All Attendees each become something an attendee can scroll and search. Leave it unticked and the group still works for everything else, it just isn’t published as a directory.
This is the control you want before anyone worries about privacy. If a group shouldn’t be a published list of names, don’t tick Build Page. -
Gated access: who can open what
Pages can be restricted to chosen groups. That’s how a members-only page, a board pack, an early-career workshop or a sponsor briefing stays out of view for everyone else while the rest of the site stays open. You set it per page, so the same event can be mostly public with a handful of restricted corners.
The controls live in Event website → Configuration, a row per page with a Who has access column. Leave it on everyone for open pages and switch it to a group for the ones that should be gated. The same table sets each page’s Visibility, whether it opens in app or in a browser, and which page is your home page.
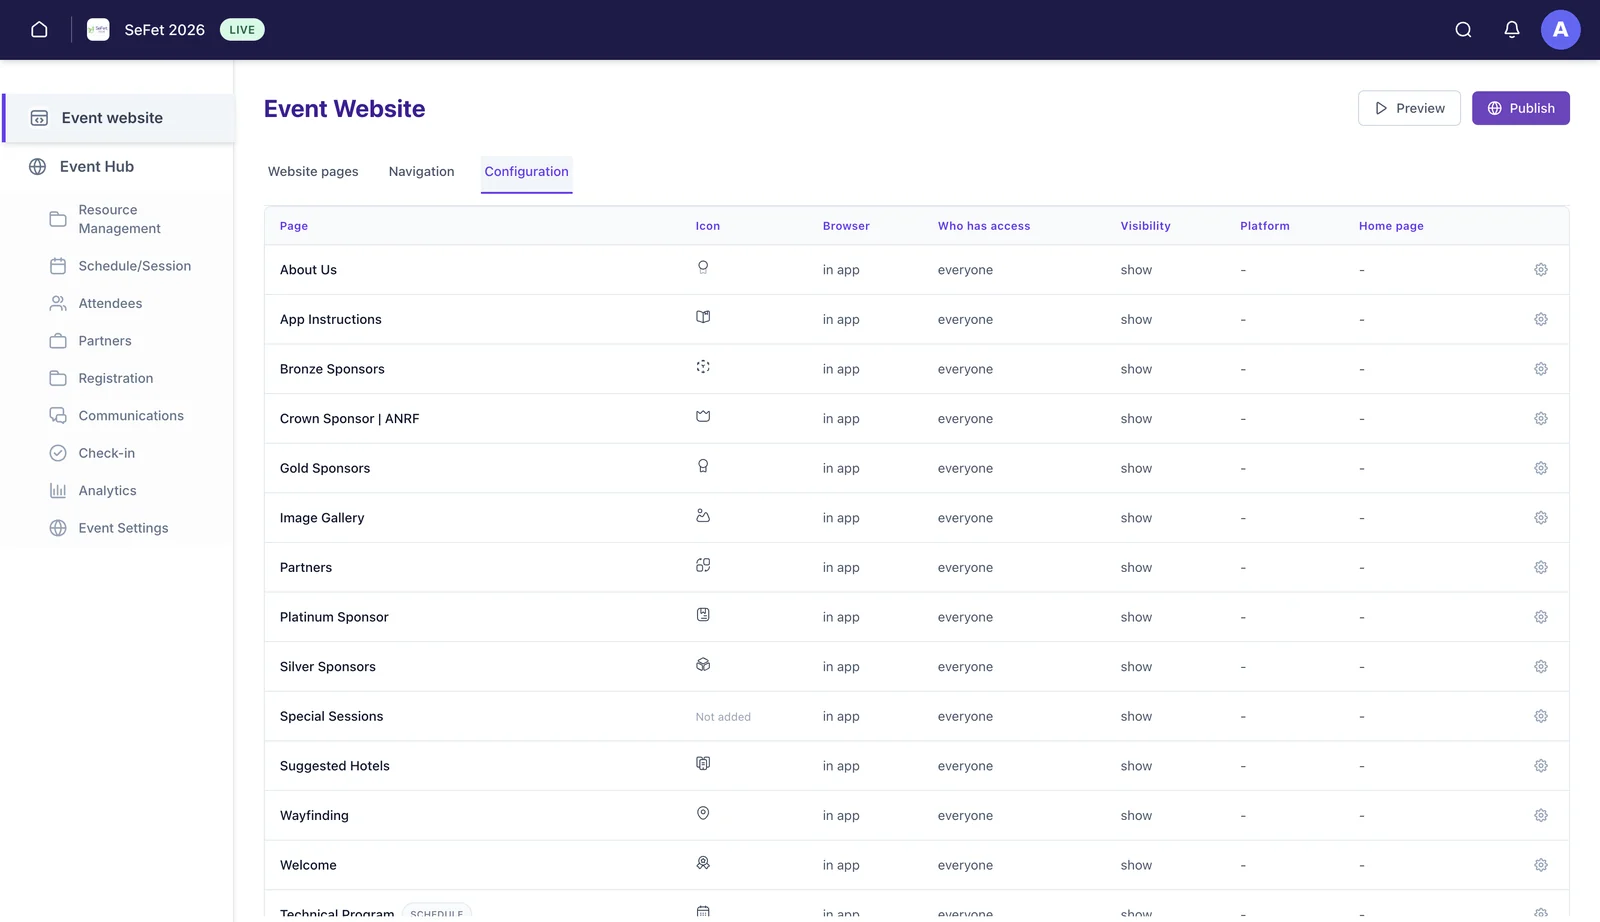
Groups with Build Page ticked show up here too, listed under User Groups alongside your ordinary pages. A ticket tier like Day Pass or VIP Pass is a group, so it becomes a page you can gate like any other.
-
Check-in: who is expected, and where
Groups carry through to the door. Checking in the Conference Dinner group on Friday evening is a different question from checking in All Attendees on Wednesday morning, and groups are what let you ask each one separately. See How attendees check in with QR codes.
-
Communications: who hears from you
Messages go to groups, not to your whole list. A room change reaches the people in that stream; a dinner reminder reaches the people who bought a dinner ticket. It is the difference between an event people pay attention to and one they mute.
Setting groups up
Open Attendees → Groups and click + New group. The User Count column shows how many people are in each one, which is the quickest way to catch a group you meant to fill and didn’t.
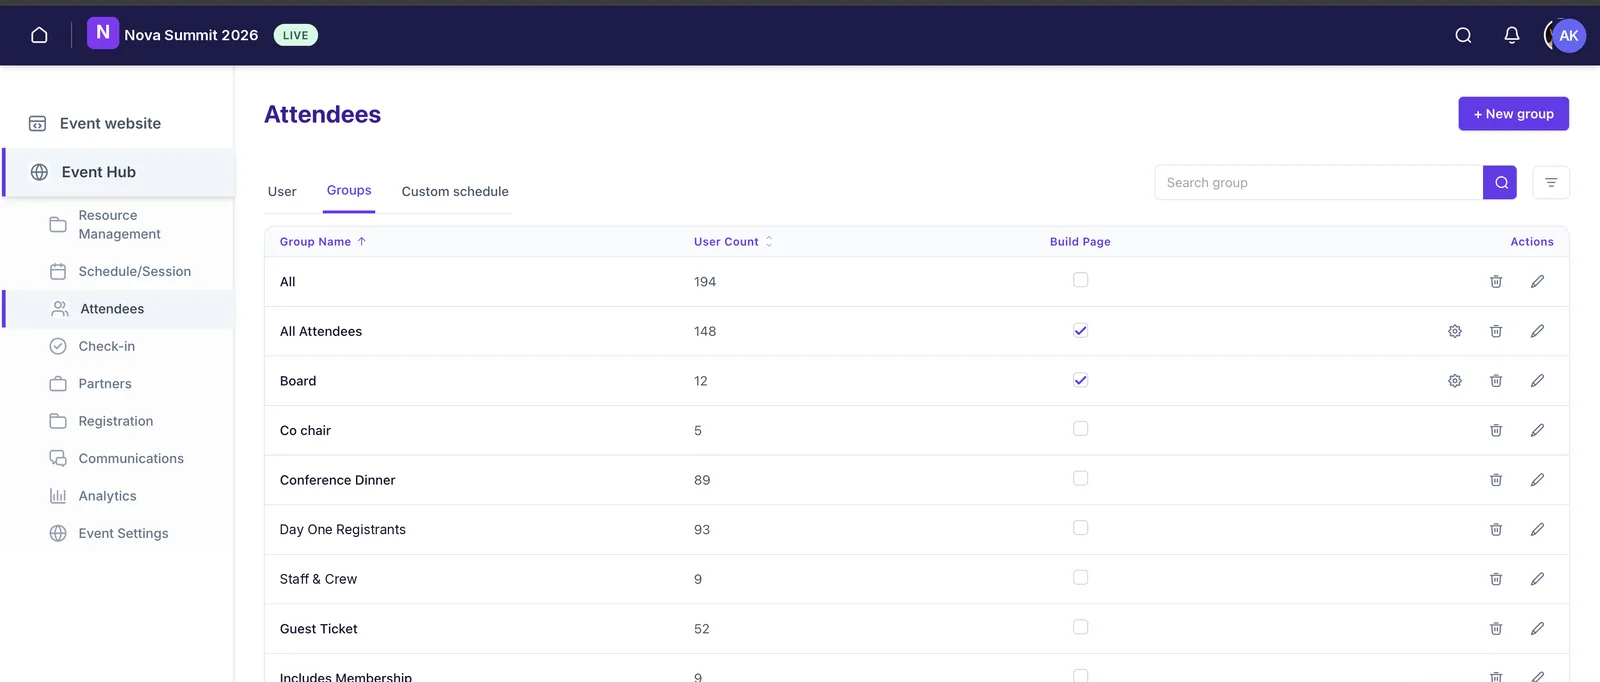
To fill a group, go to the User tab, tick the people you want and use Add to group. You can select a whole filtered page at once, so “everyone from this import” or “everyone in that category” is a couple of clicks rather than a couple of hours. Groups can also come straight from your spreadsheet at upload time, see Import attendees, speakers & sponsors in bulk.
How groups relate to your event’s accessibility
Groups work differently depending on how open your event is as a whole:
- Public events are open to all and visible from your landing page. Groups mostly shape the networking lists. Attendees still sign in for anything that records an action, saving a session, messaging someone, giving feedback.
- Public events with gated pages keep most information open but restrict specific pages, an attendee list, a members area, to chosen groups. This is the most common shape for a conference with a membership behind it.
- Private events are invite-only. Attendee emails go in first, and the event only appears in someone’s My events after they sign up with an address you added. Groups then control what each invited person sees.
See Create your first event for choosing between the three.
Still need help? Reach our team and we'll get you sorted.
Contact support →