Registration forms
-
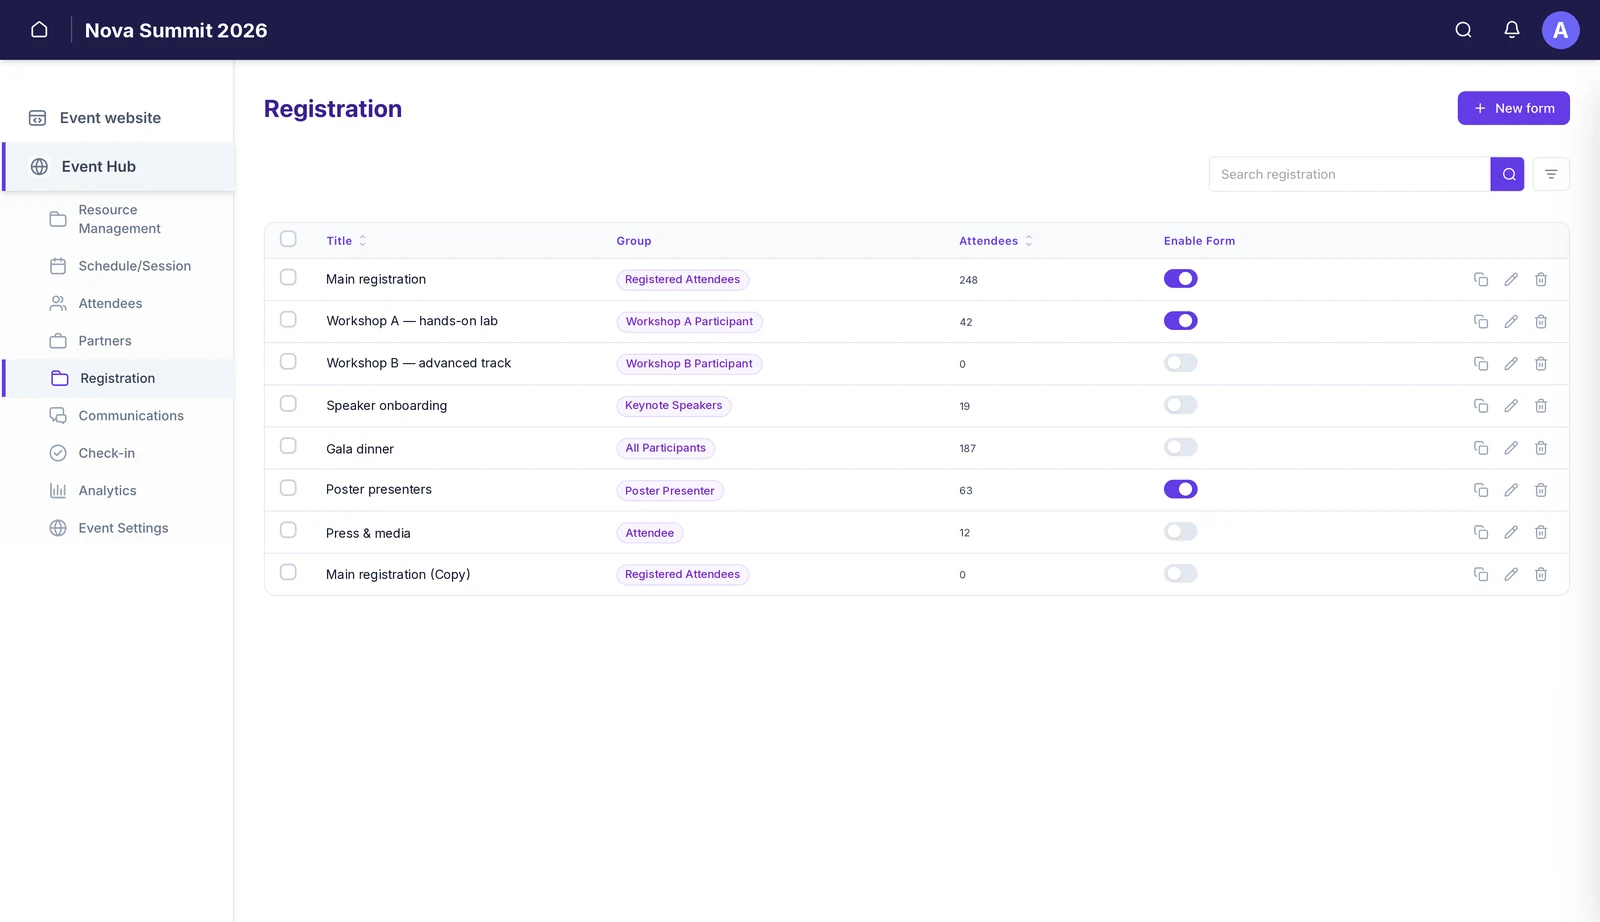 One row per formEach form shows its group, how many people have registered, and whether it is live.
 -
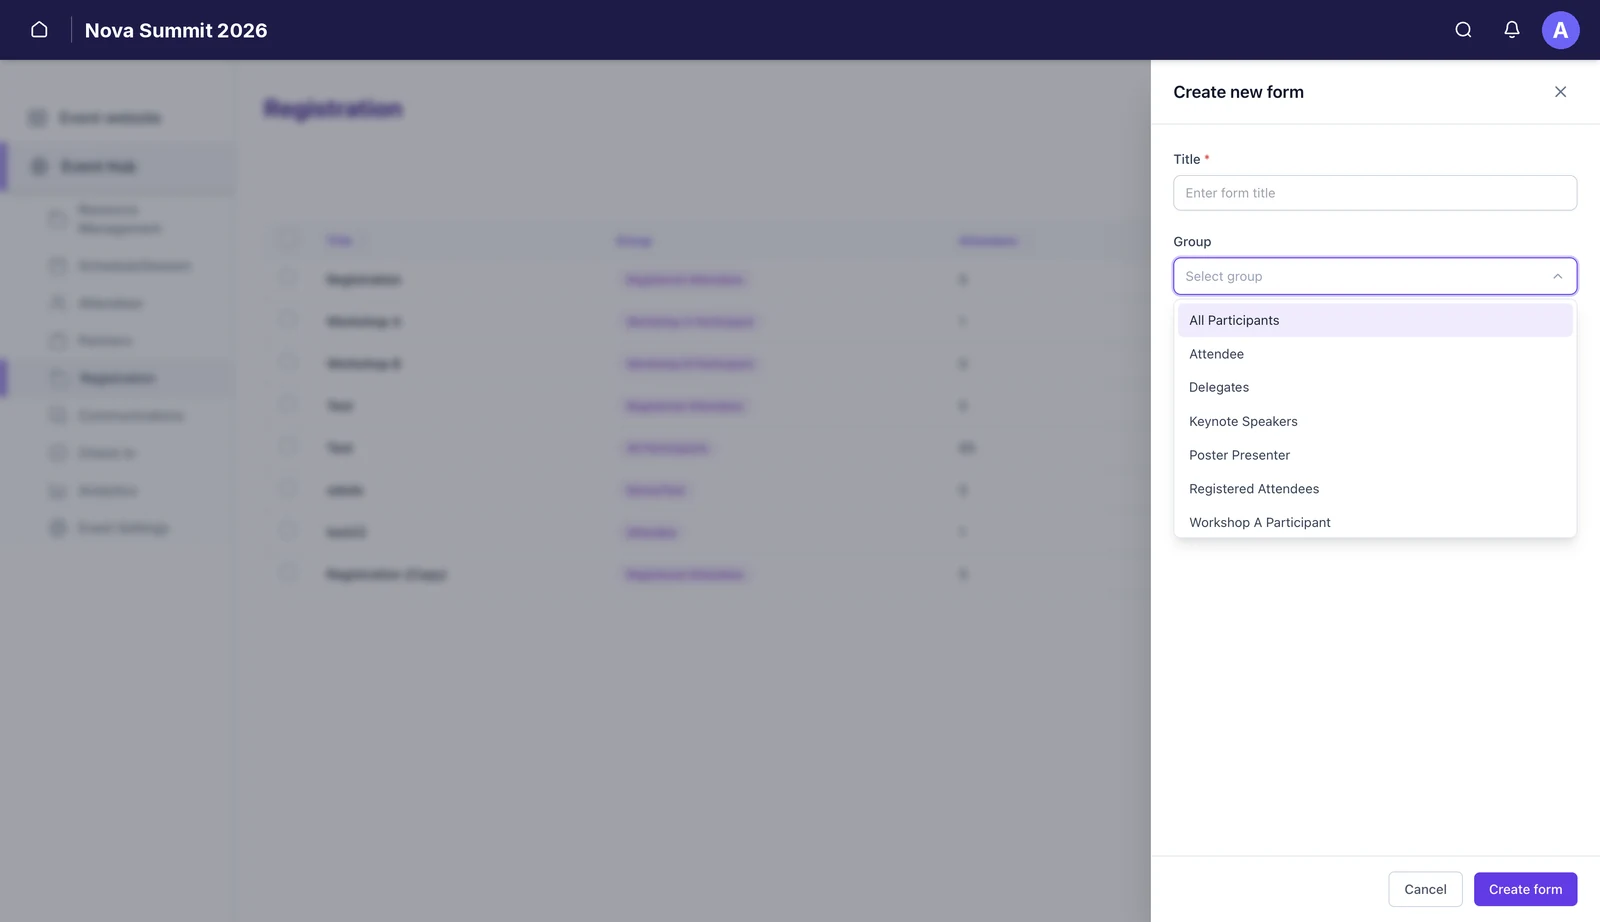 A form needs a title and a groupThe group is the decision that matters — it is where registrants end up.
 -
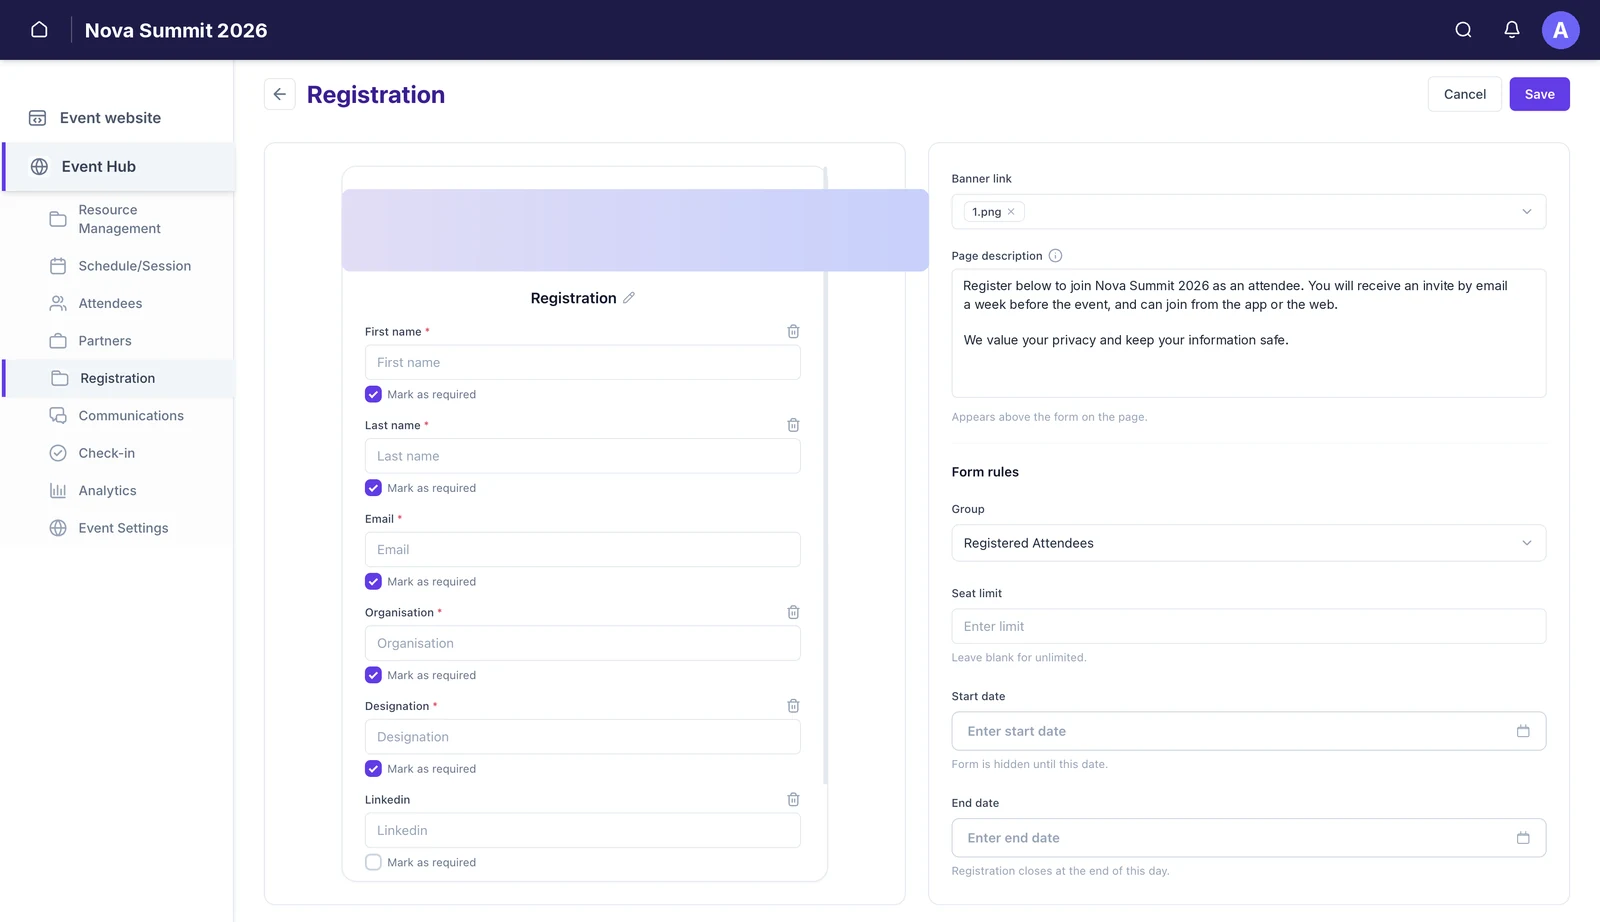 Fields on the left, rules on the rightMark fields required, then set the seat limit and the open and close dates.
 -
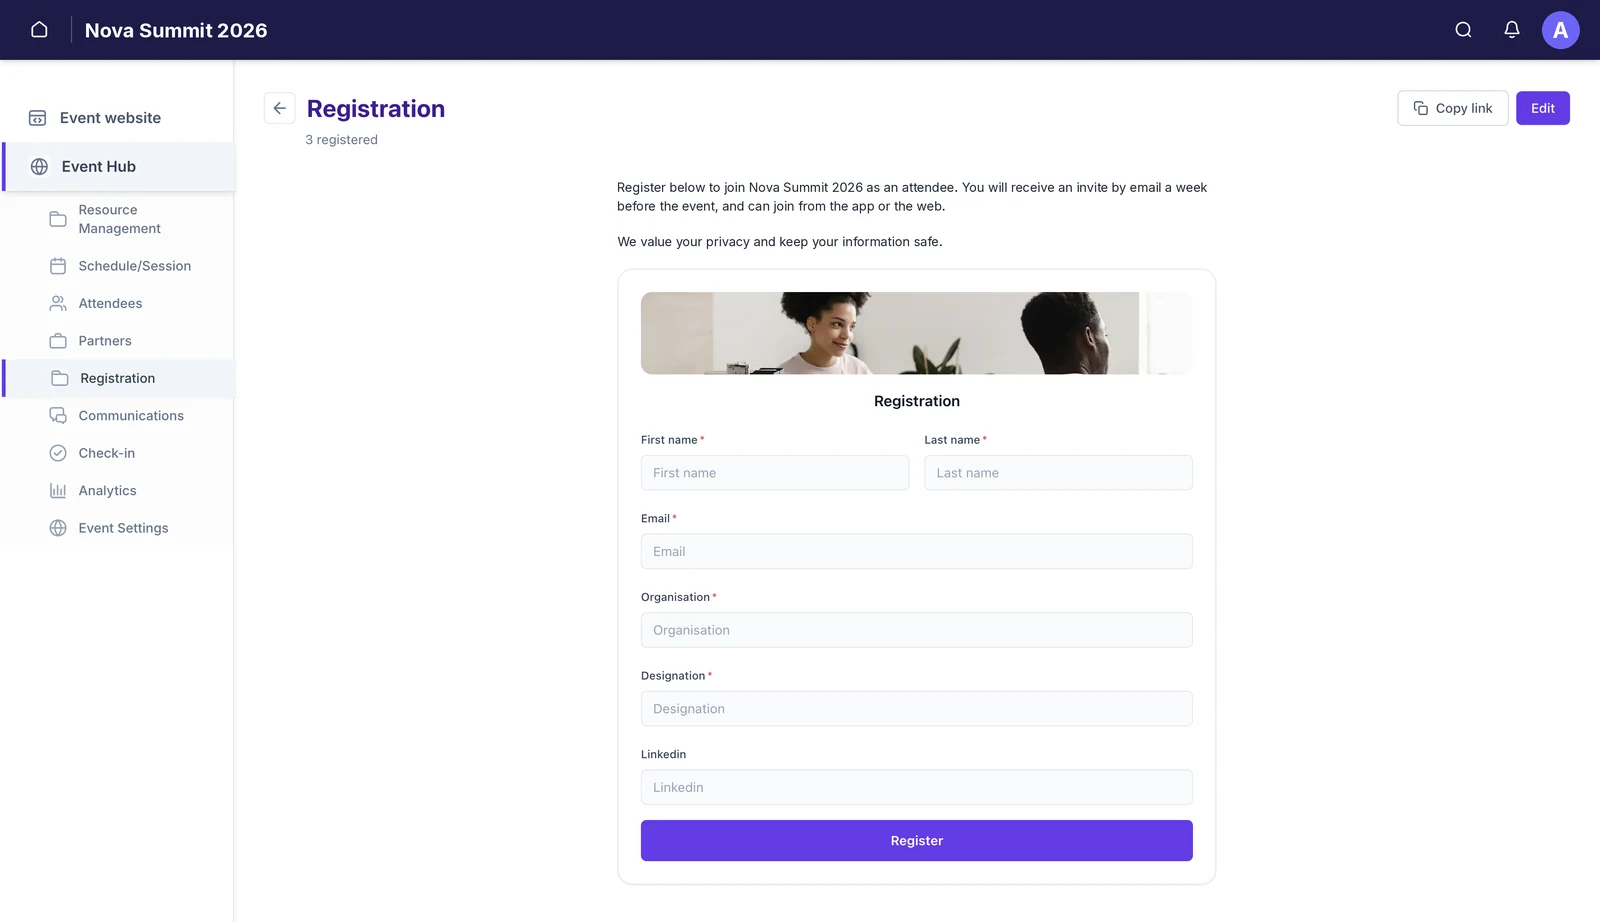 Share itCopy link gives you the URL, and the running count sits under the title.
-
Start from the Registration list
From the Event Hub sidebar, open Registration. Every form you have built is listed with four things worth reading across: the title, the group registrants join, the number of attendees collected so far, and Enable Form.
Several forms per event is normal — a main registration, one per workshop, one for speakers. On the right of each row: duplicate, edit and delete. Duplicating is the quickest way to build the second workshop form once the first is right.
Most events end up with more than one form. A single form sending everyone into one group cannot tell a workshop attendee from a poster presenter later, when you are deciding who gets which push notification.
-
Create a form
Click + New form. You need a title, and a group from the dropdown.
The dropdown lists the groups that already exist on your event. The group is the consequential choice. Everyone who completes this form joins it, and groups are what drive gated pages, attendee lists, check-in and who receives which broadcast — see Groups: control access, networking & comms. If the right group does not exist yet, create it first.
-
Choose your fields, and which are required
In the editor, the form itself is on the left. Each field has a Mark as required checkbox and a delete icon, so you decide both what you ask and what you insist on.
Fields and required flags on the left; banner, description and rules on the right. On the right you can set a banner image and a page description, which appears above the form on the page.
Ask for less than you think you need. Every required field is a reason to abandon the form, and an organisation and job title you never use is worse than a blank you can fill in later from the attendee record.
-
Set the form rules
Under Form rules, below the group:
- Seat limit — caps how many can register. Leave blank for unlimited. This is where session and workshop capacity is enforced; there is no capacity field on the session itself.
- Start date — the form is hidden until this date.
- End date — registration closes at the end of this day.
Dates and a seat limit together mean you rarely need to police a form by hand: it opens when you said, closes when you said, and stops at the number you set.
ⓘA seat limit is a hard stop, not a waitlist. When a workshop fills, the form stops accepting entries — it does not queue people behind it. -
Publish it, and share the link
Turn Enable Form on. The form is now live at its own URL, and the form view shows a running registered count under the title with a Copy link button beside it.
The published form, with its live count and the link to share. That link works anywhere — an email, your own website, a QR code on a poster. You can also surface the form as a page inside the event website, in which case it appears in the attendee menu like any other page. See Add & manage your event website pages.
-
Editing a form that is already live
This is the step people get caught by. Enable Form on means published and accepting entries. To change a live form, switch the toggle off first, make your edits, Save, then switch it back on.
⚠While the form is disabled the link stops accepting registrations, so do this deliberately — not in the middle of your busiest registration day. Entries already collected are not affected.
What this isn’t
- It isn’t paid ticketing. Registration collects people and puts them in a group. It does not take payment. For paid tickets, Ticket Tailor drops into the page builder — see Connect Ticket Tailor to Eventira.
- It isn’t a waitlist. A seat limit closes the form; it does not hold a queue.
- It isn’t approval-based. Anyone with the link who completes the form joins the group.
Still need help? Reach our team and we'll get you sorted.
Contact support →