Send emails & push notifications
Before you start
The Communications list
Open Event Hub → Communications. Everything you have written for this event lives here, sent or not.
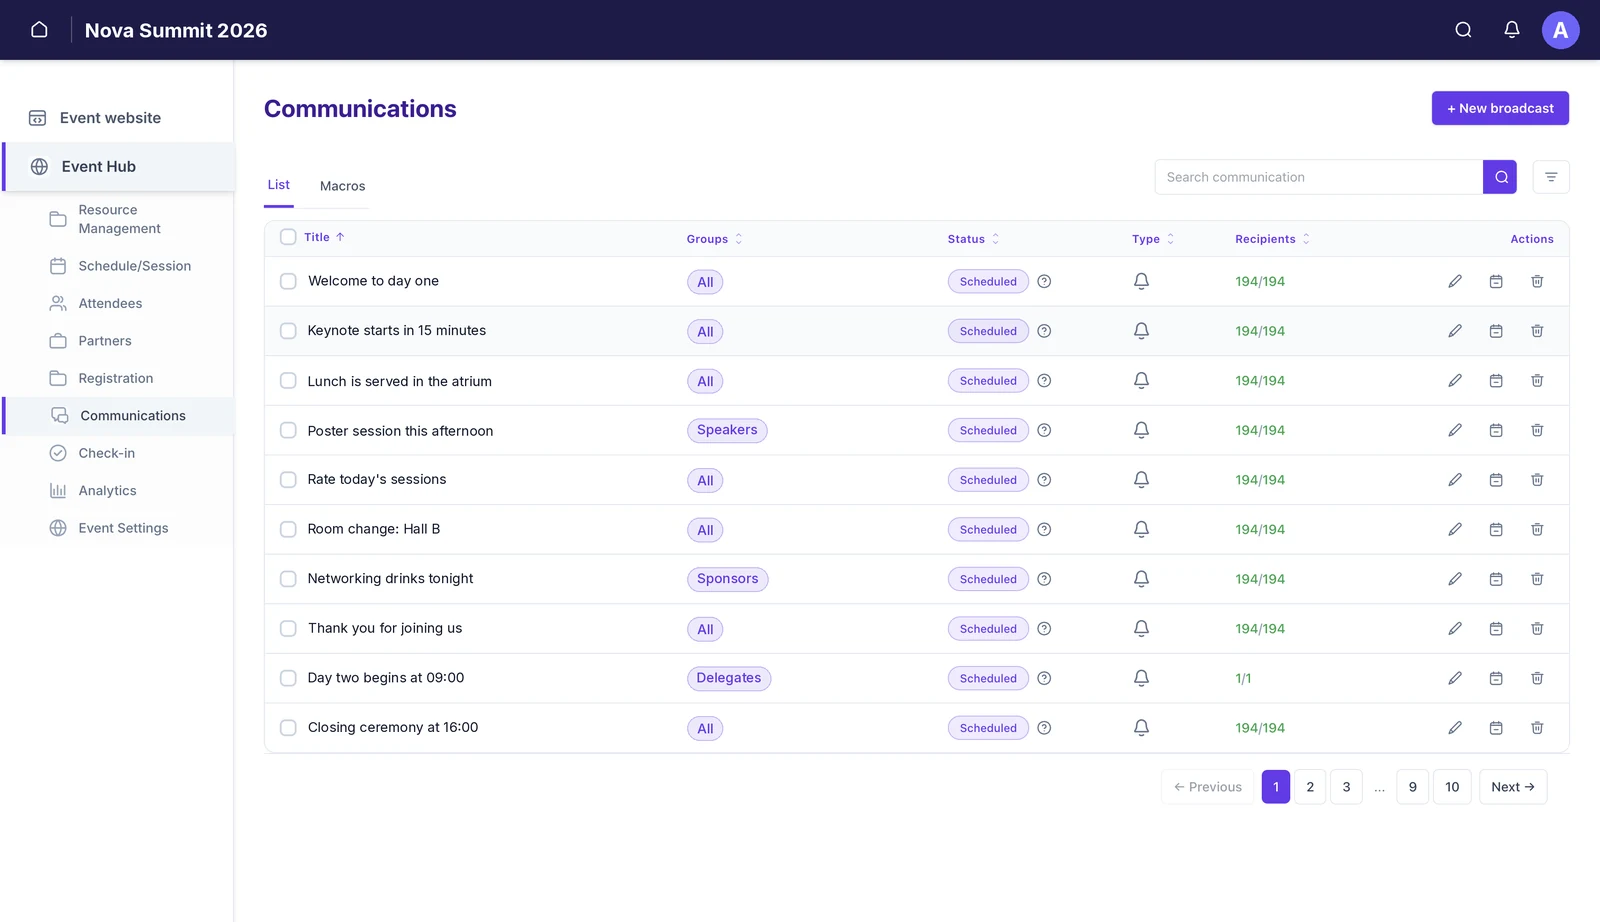
The columns carry most of what you need to know:
- Groups — who it is addressed to. A group name, an individual email address, or No groups if you haven’t chosen recipients yet.
- Status — Draft, Scheduled or Sent. Hover the question mark next to Scheduled to see the exact date and time it will go.
- Type — a bell for push notification, an envelope for email.
- Recipients — delivered out of total, so 194/194 means everyone got it. A draft sits at 0/0.
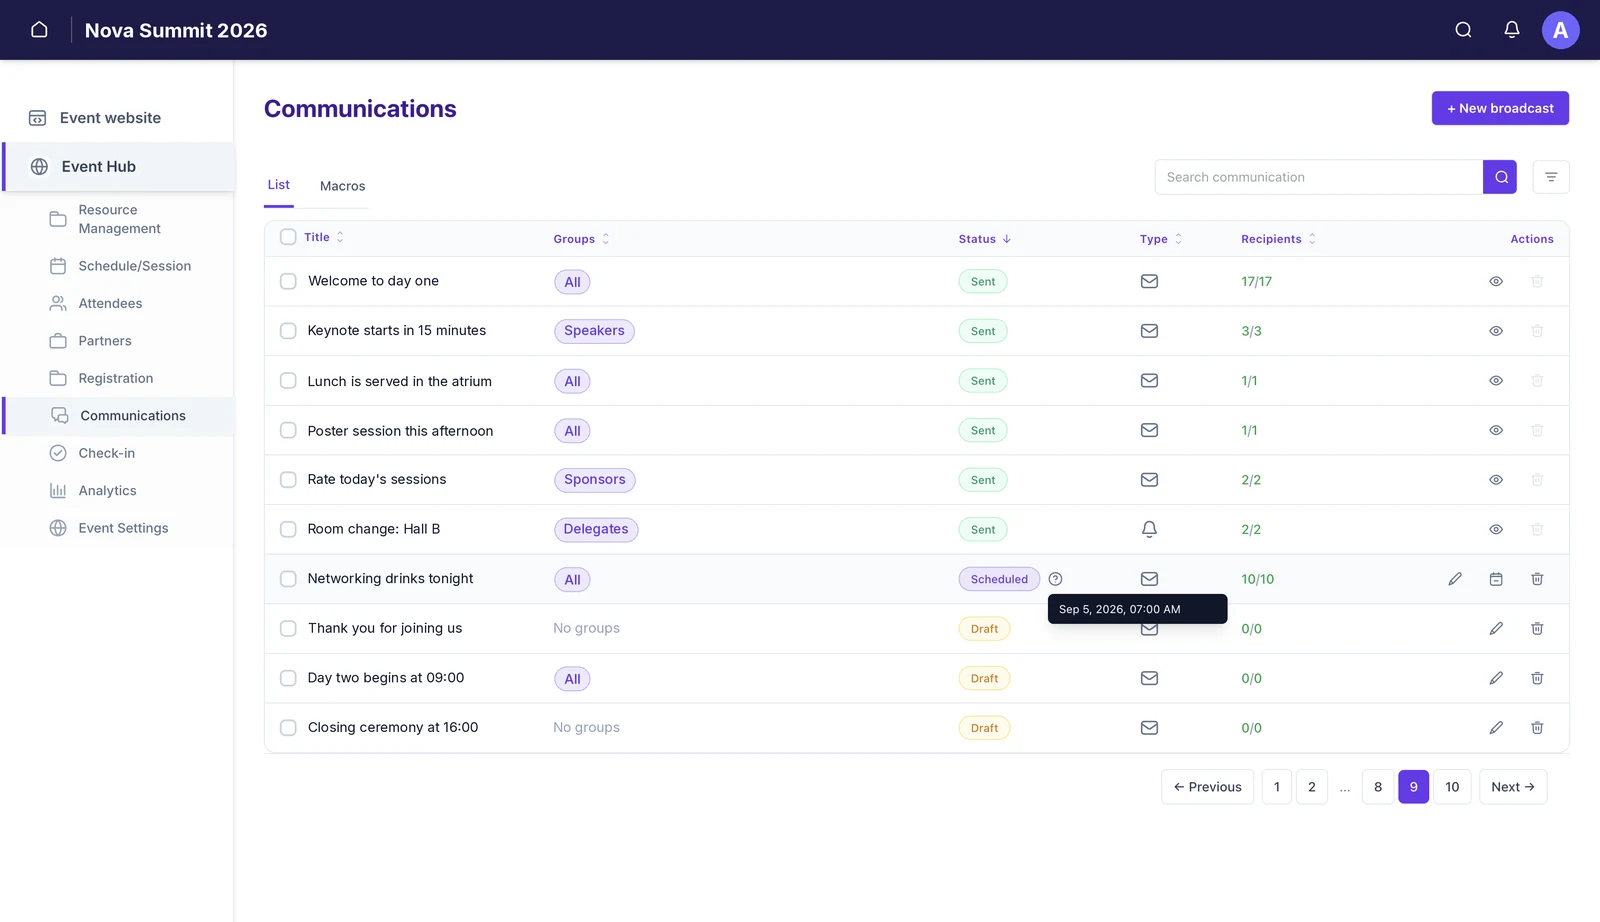
The actions on the right change with status. A draft or scheduled broadcast can be edited, rescheduled or deleted. A sent one can only be viewed — sent is sent.
Steps
-
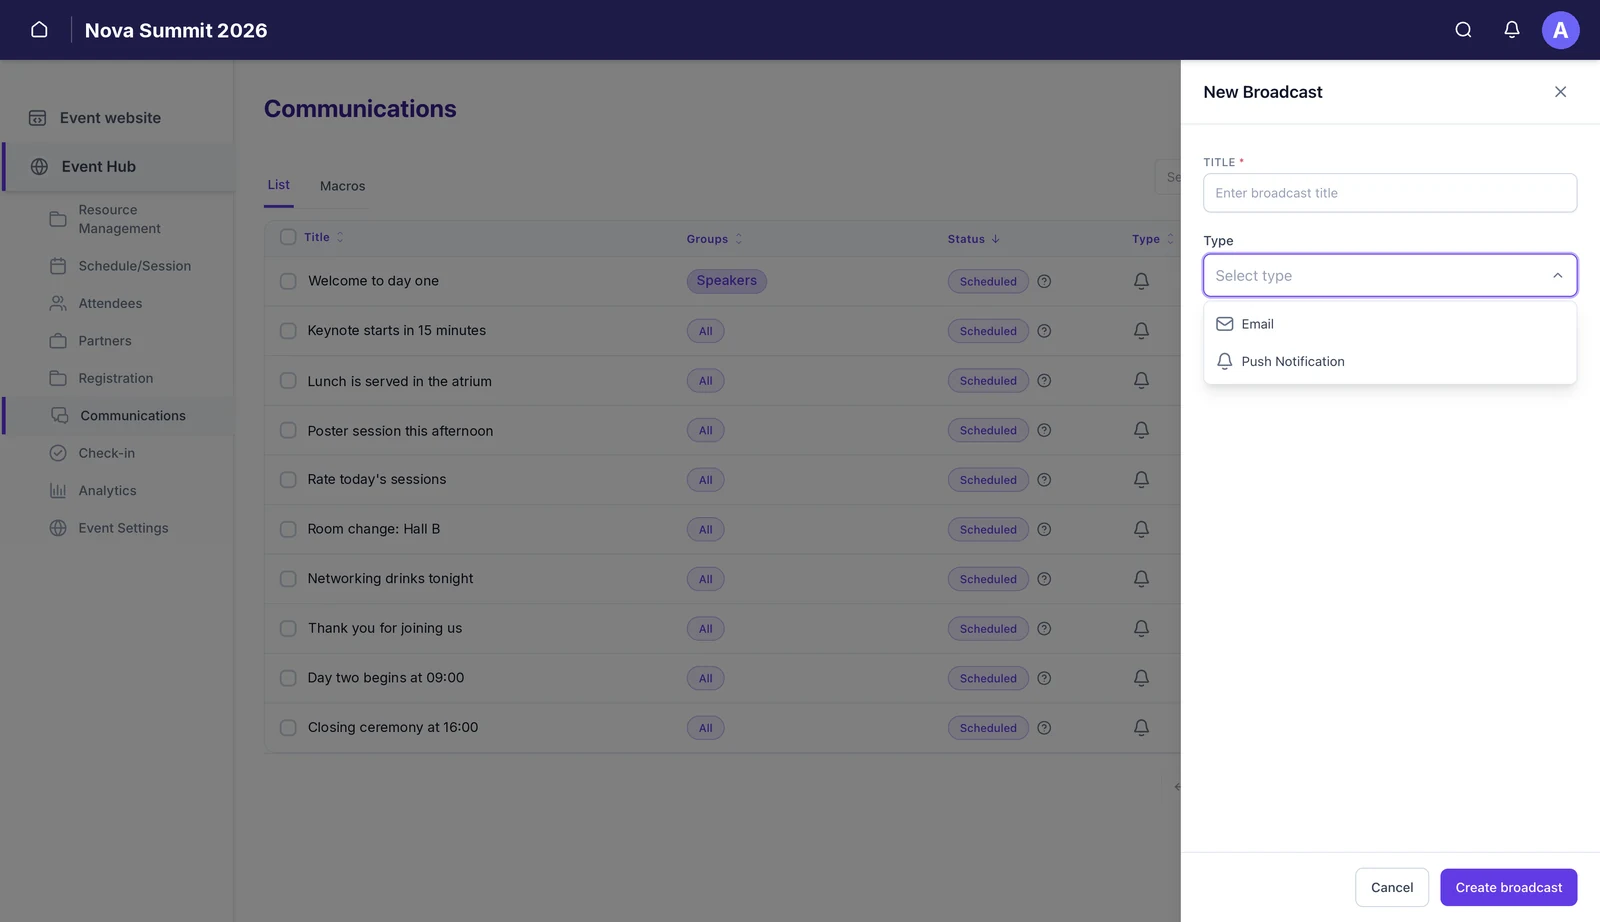 Start a new broadcastClick + New broadcast, give it a title, and choose the type.
 -
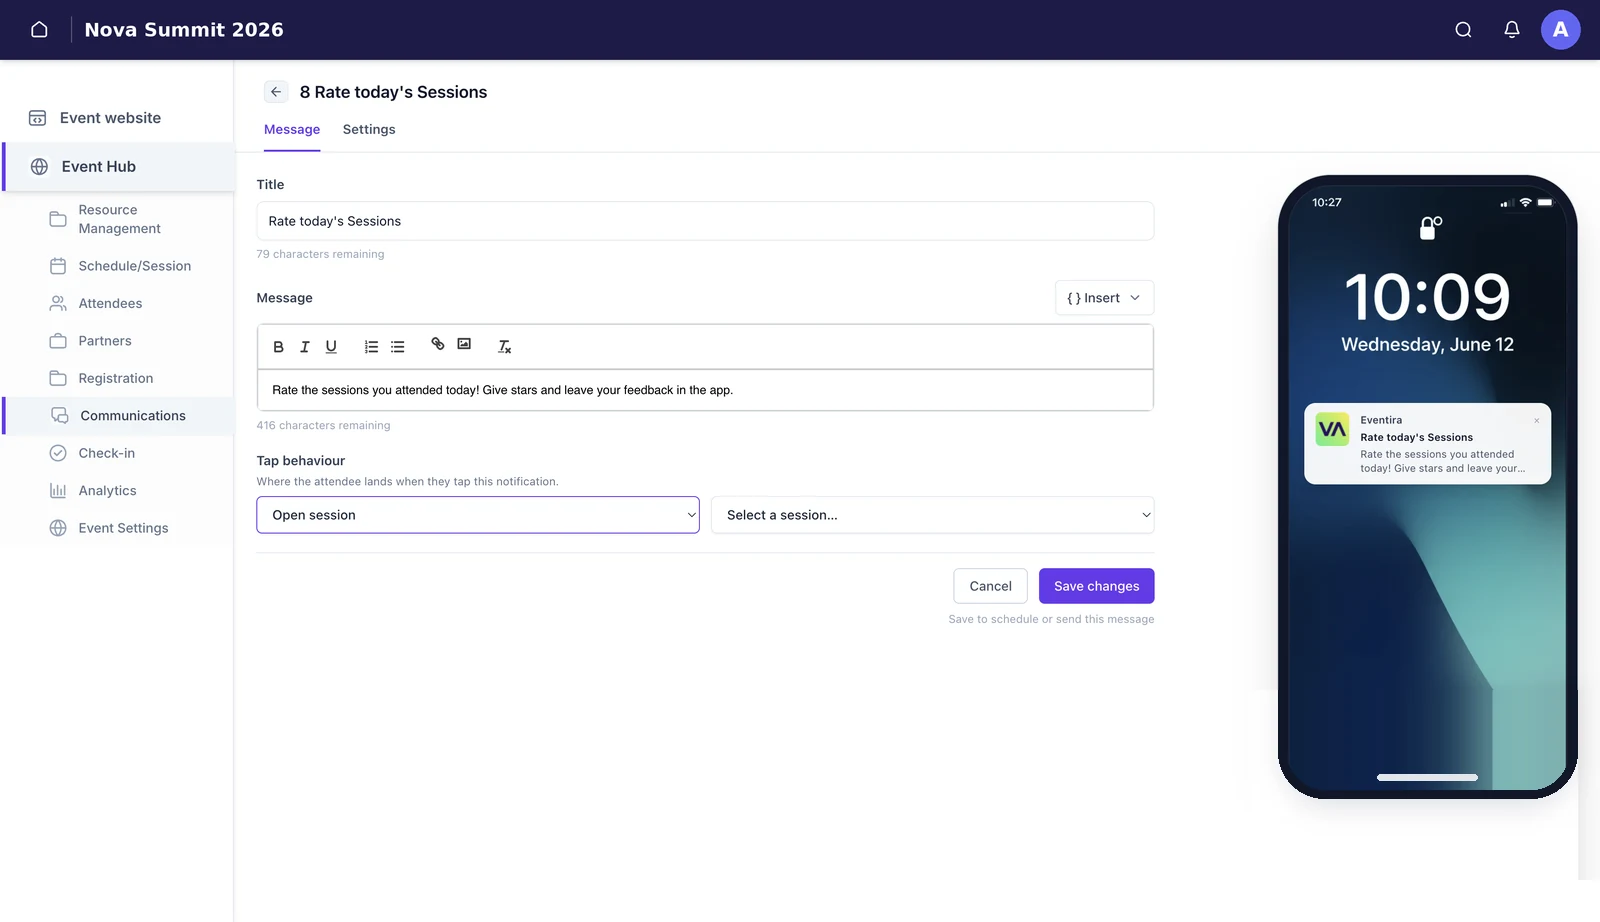 Write a push notificationA push has a title (up to 100 characters), a message (up to 500), and a tap behaviour — where the attendee lands when they tap it.
 -
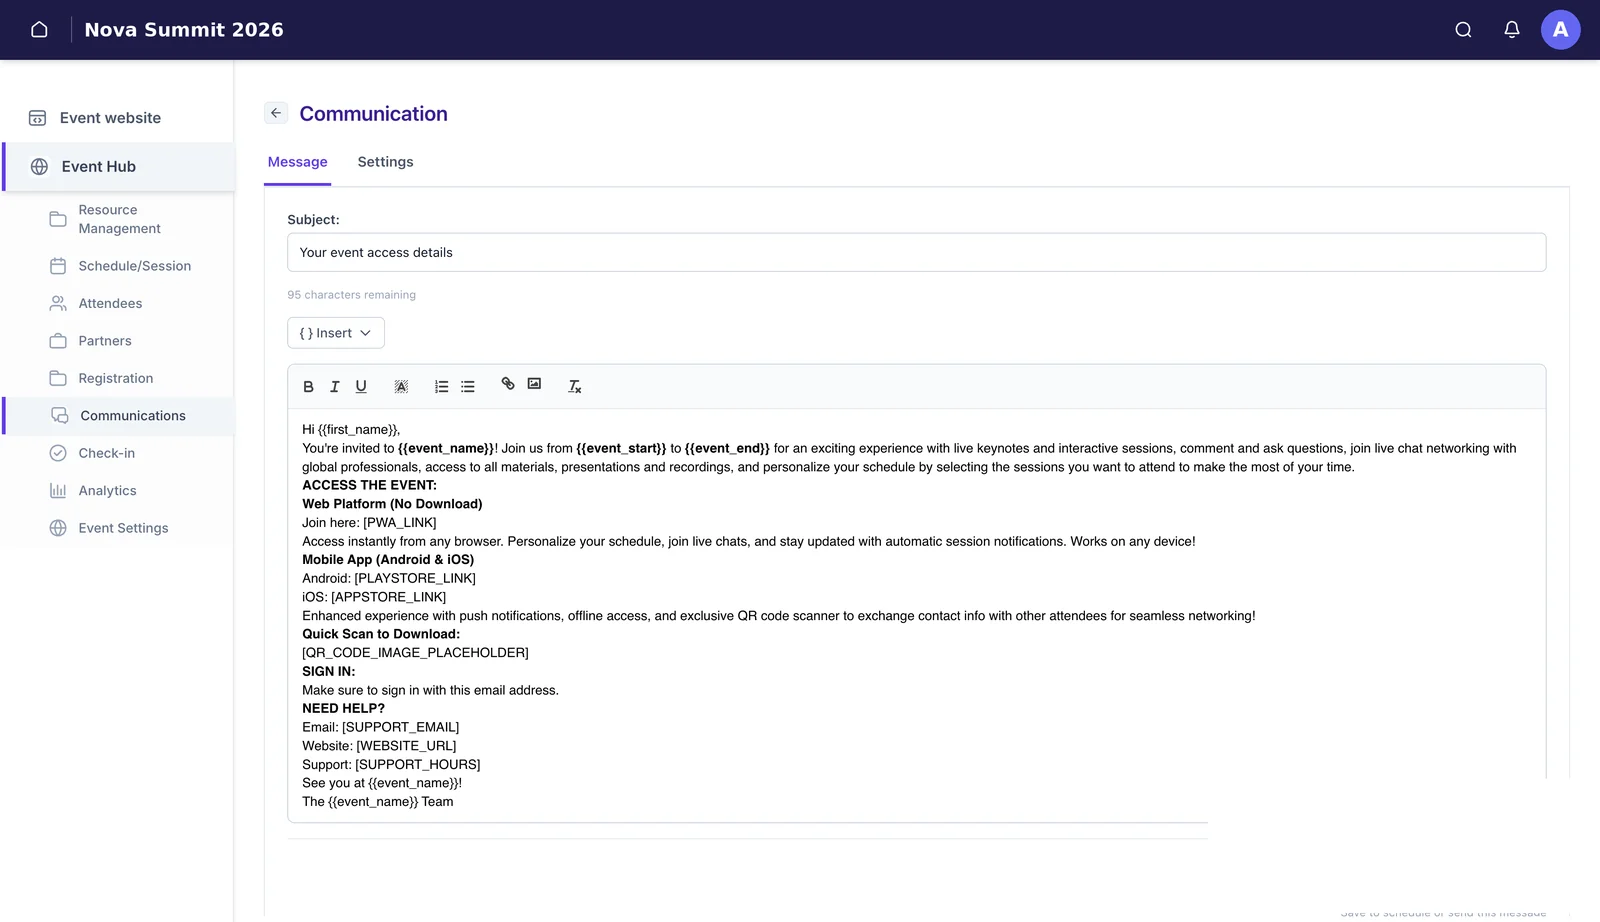 Or write an emailAn email has a subject and a rich-text body: bold, italic, underline, lists, links and images.
 -
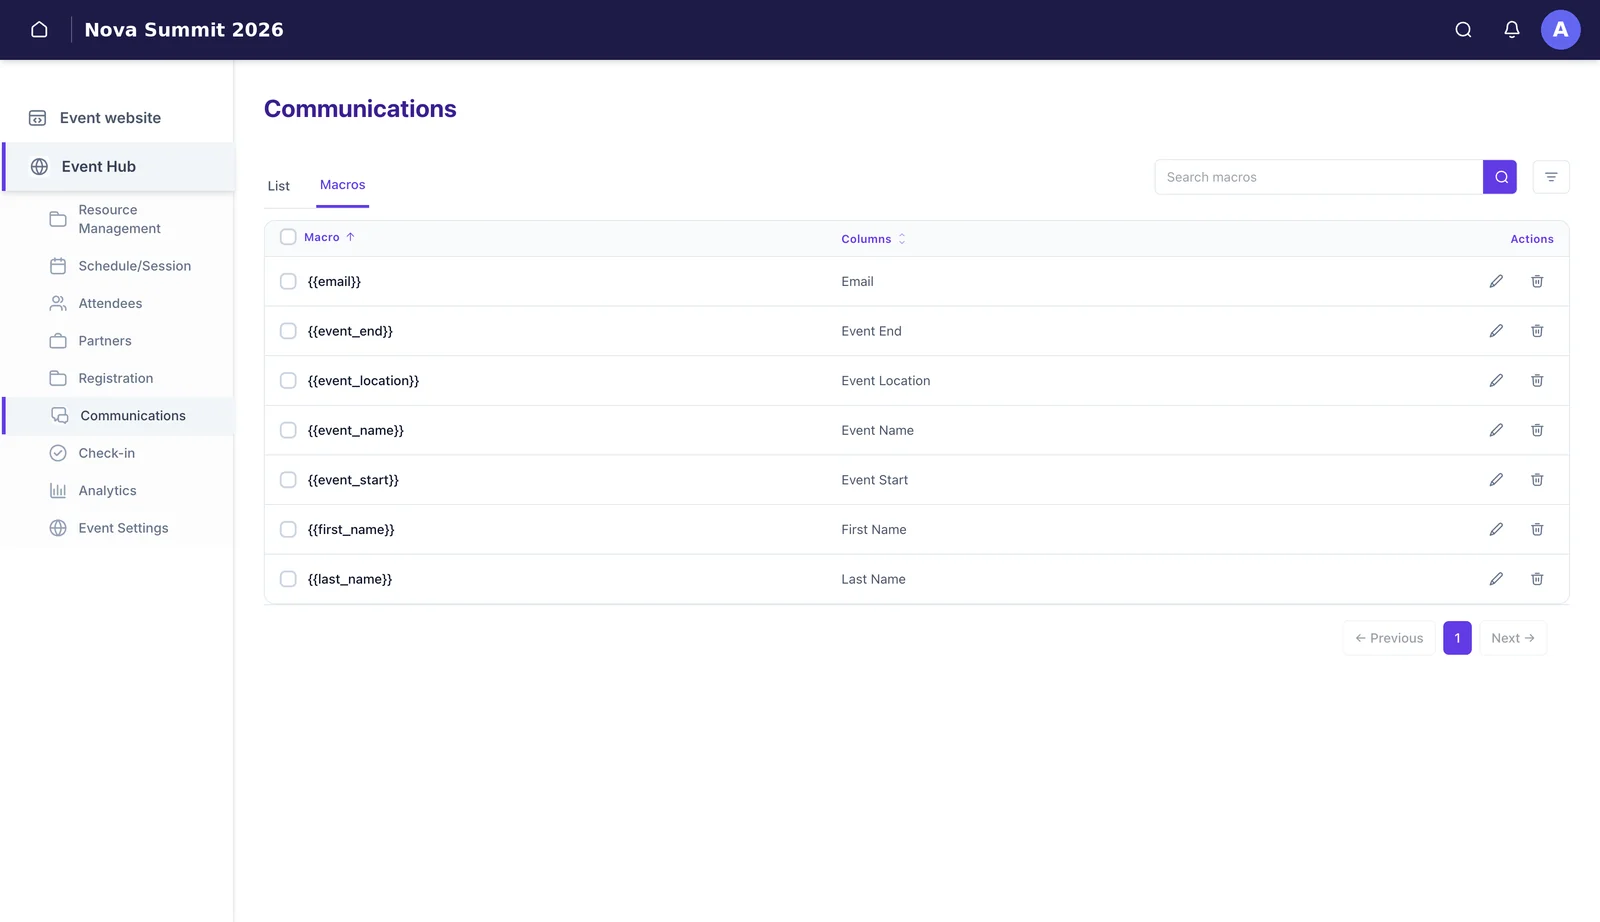 Personalise it with macrosMacros fill in per person when the broadcast goes out — first name, event name, dates, location.
 -
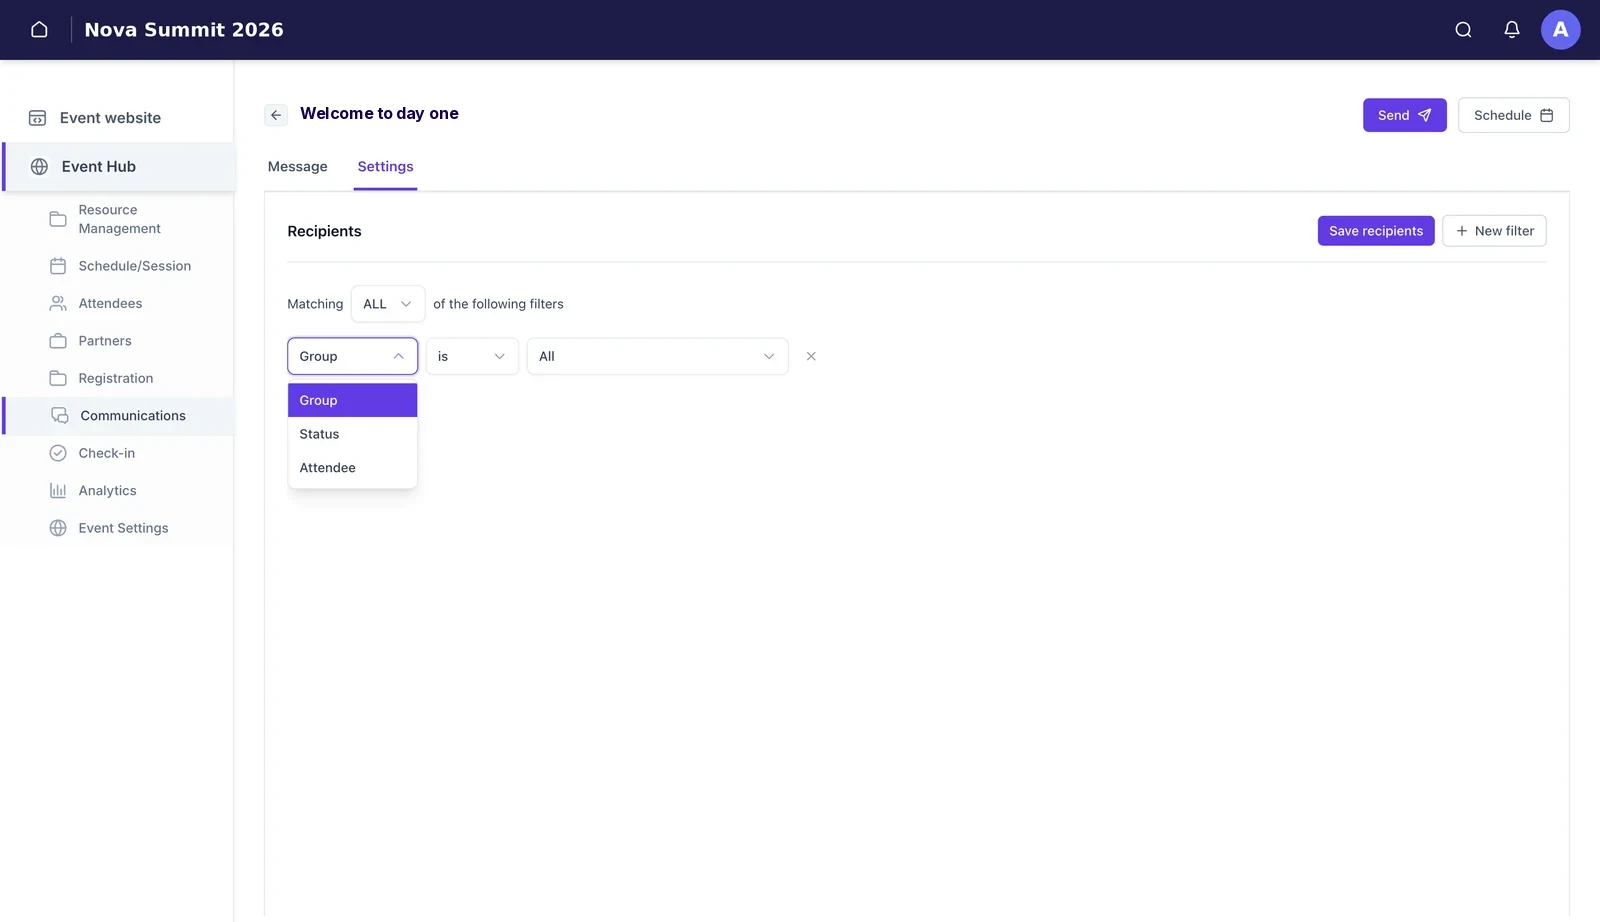 Choose who receives itOn the Settings tab, build filters on group, sign-in status or individual — matching ALL or ANY.
 -
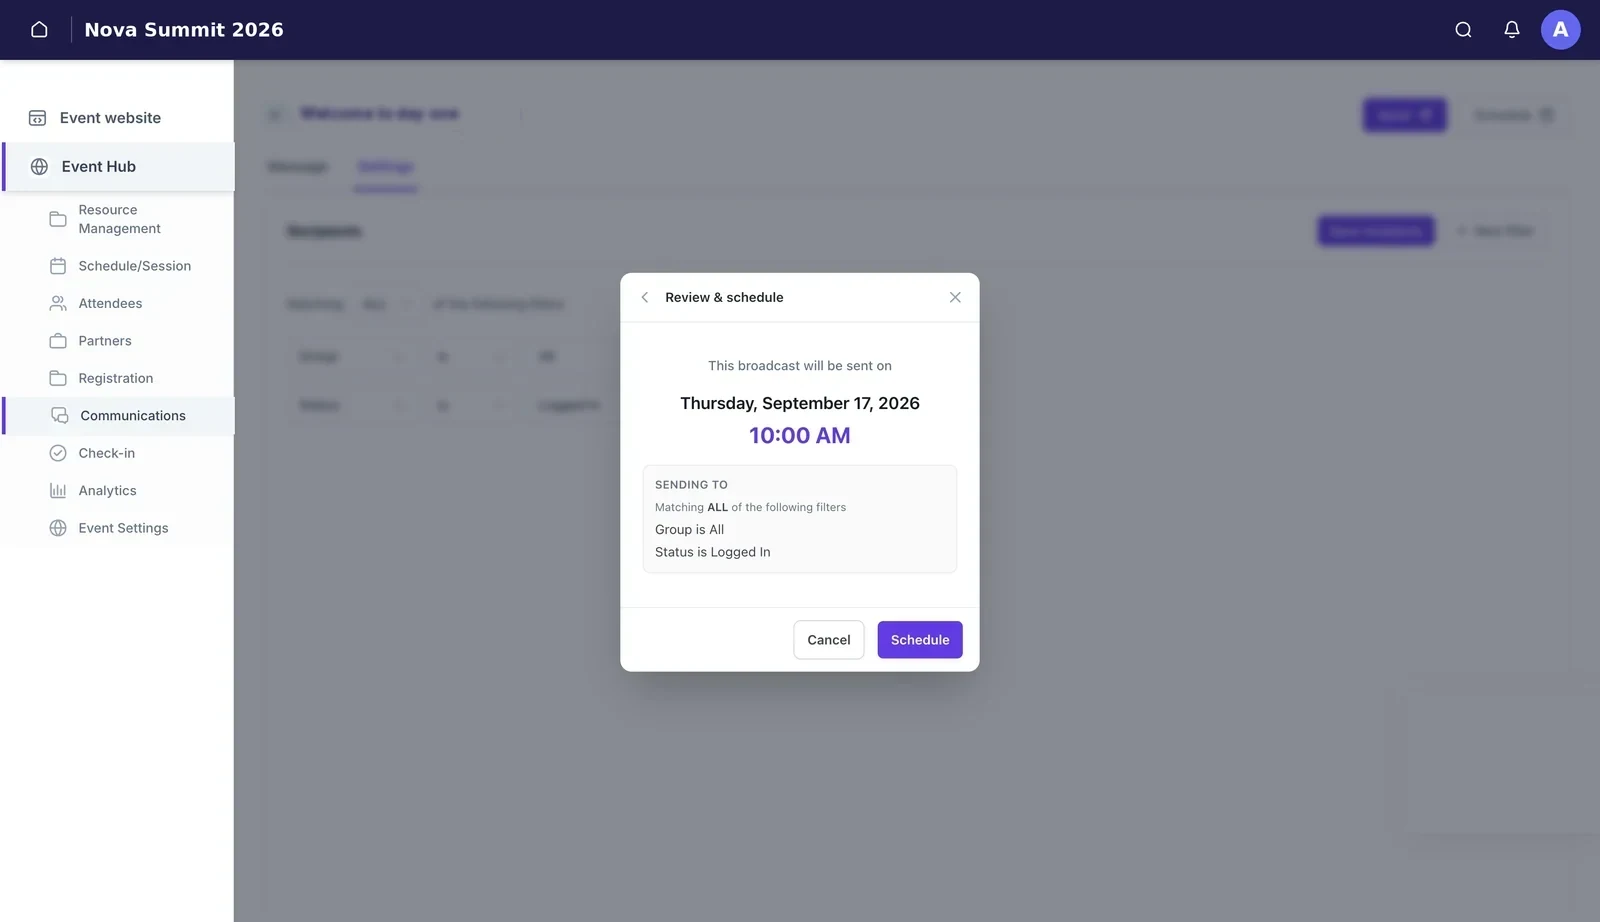 Send now, or schedule itSend shows you a preview of the finished message with its recipient list before anything leaves.
 -
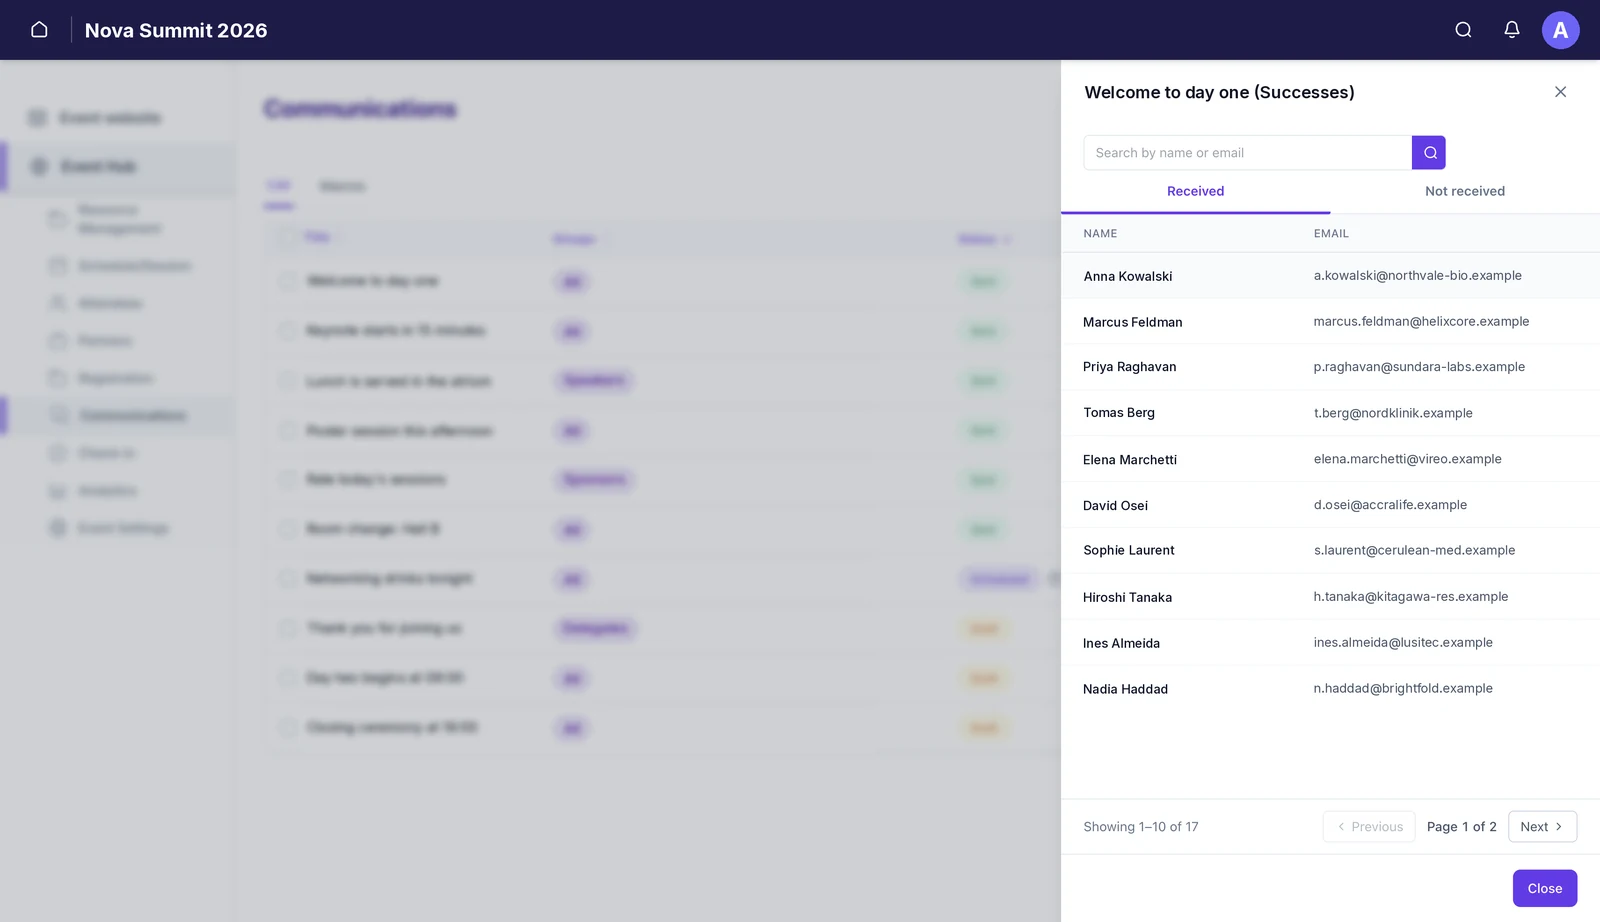 Check who actually received itClick the recipients count on a sent broadcast for Received, Not received, and a reason for each failure.
-
Start a new broadcast
Click + New broadcast, give it a title, and choose the type.
Two types. A broadcast is one or the other. ⚠You cannot send both at once. A broadcast is an email or a push notification. If you want the same announcement to go out both ways, create two broadcasts. The title is only for your own reference in the list — it is not the subject line. -
Write a push notification
A push has a title (up to 100 characters), a message (up to 500), and a tap behaviour — where the attendee lands when they tap it. Point it at a session and they arrive on that session rather than the app’s front page.
The preview on the right is a real lock screen, so you can see where your message gets truncated. ★Write the title so it works alone. On a locked phone that is often all anyone reads before deciding whether to swipe. -
Or write an email
An email has a subject and a rich-text body: bold, italic, underline, lists, links and images.
The { } Insert menu drops macros into the body. -
Personalise it with macros
Macros are placeholders that fill in per person when the broadcast goes out. The Macros tab lists every one available and the attendee column it reads from.
Seven macros, each mapped to a column on the attendee record. ⚠A macro only fills if that field is populated on the attendee. If half your list has no first name, half your emails open with an empty greeting. Worth checking the attendee list before a big send. -
Choose who receives it
Open the Settings tab. Recipients are built from filters rather than picked by hand, so the same rule keeps working as people register.
Filter on a group, on sign-in status, or on an individual attendee. Each filter is a field, an operator and a value. Fields are Group, Status or Attendee; the operator is is or is not. Add as many as you need with + New filter.
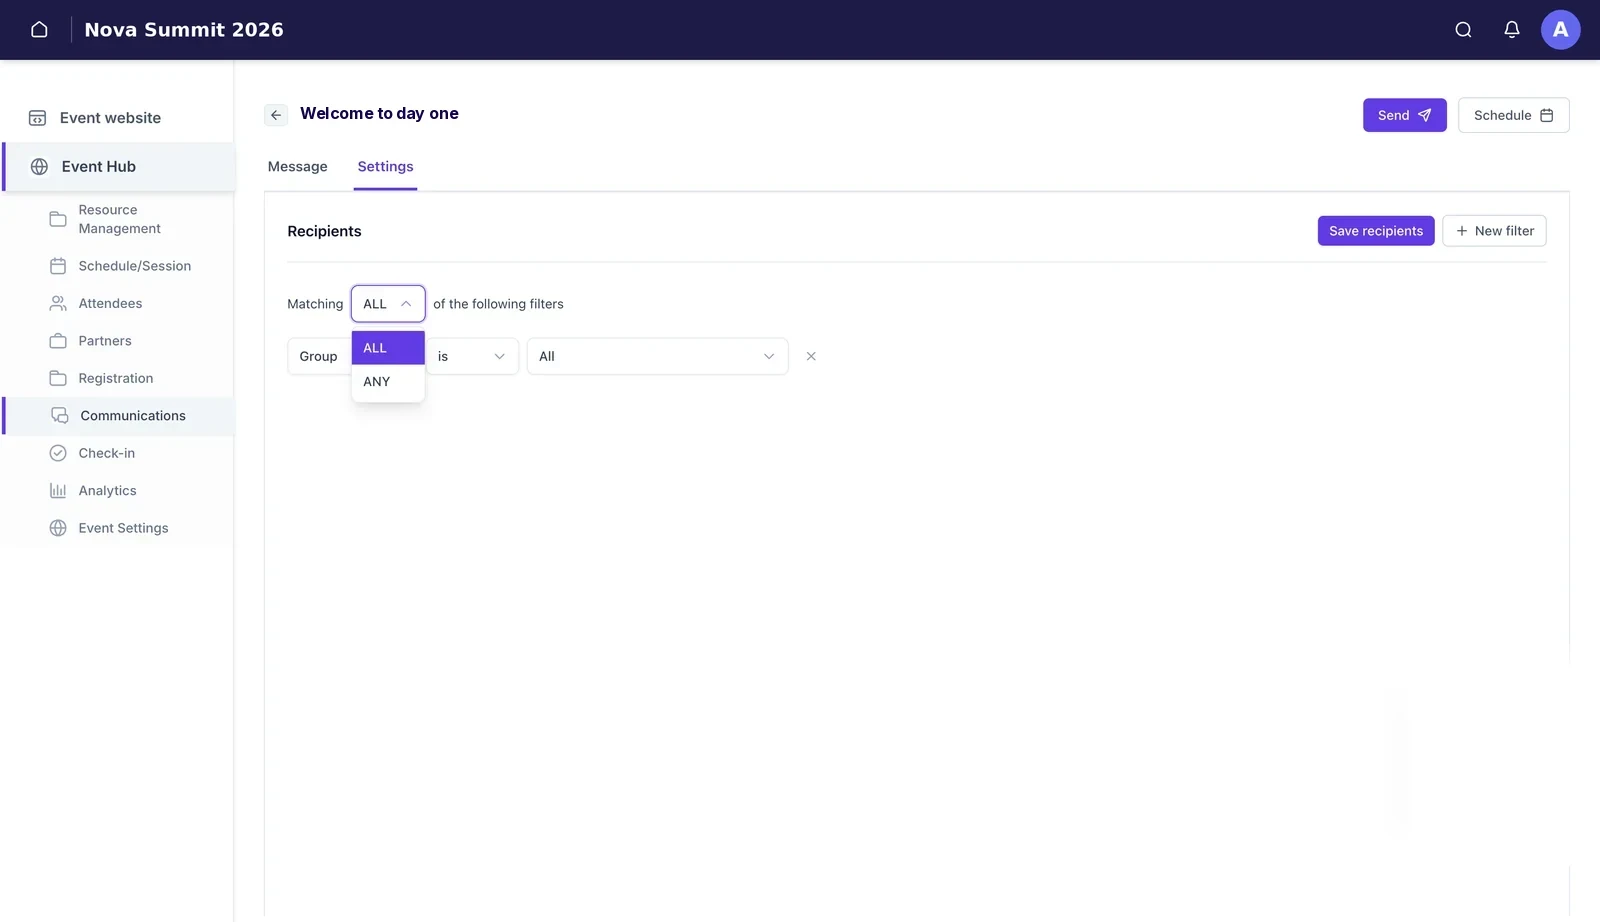
ALL narrows the audience with each filter; ANY widens it. That ALL / ANY switch is the one people get wrong. ALL means every filter has to be true, so each one you add makes the audience smaller. ANY means one match is enough, so each one makes it bigger. “Sponsors and board members” is almost always ANY, not ALL.
Click Save recipients when the filters are right.
★Filtering on Status is Logged In is the reliable way to send a push only to people who can actually receive one. See Groups for setting up the groups these filters read from. -
Send now, or schedule it
Send shows you a preview of the finished message with its recipient list before anything leaves. Schedule asks for a date, then a time, then shows you a review.
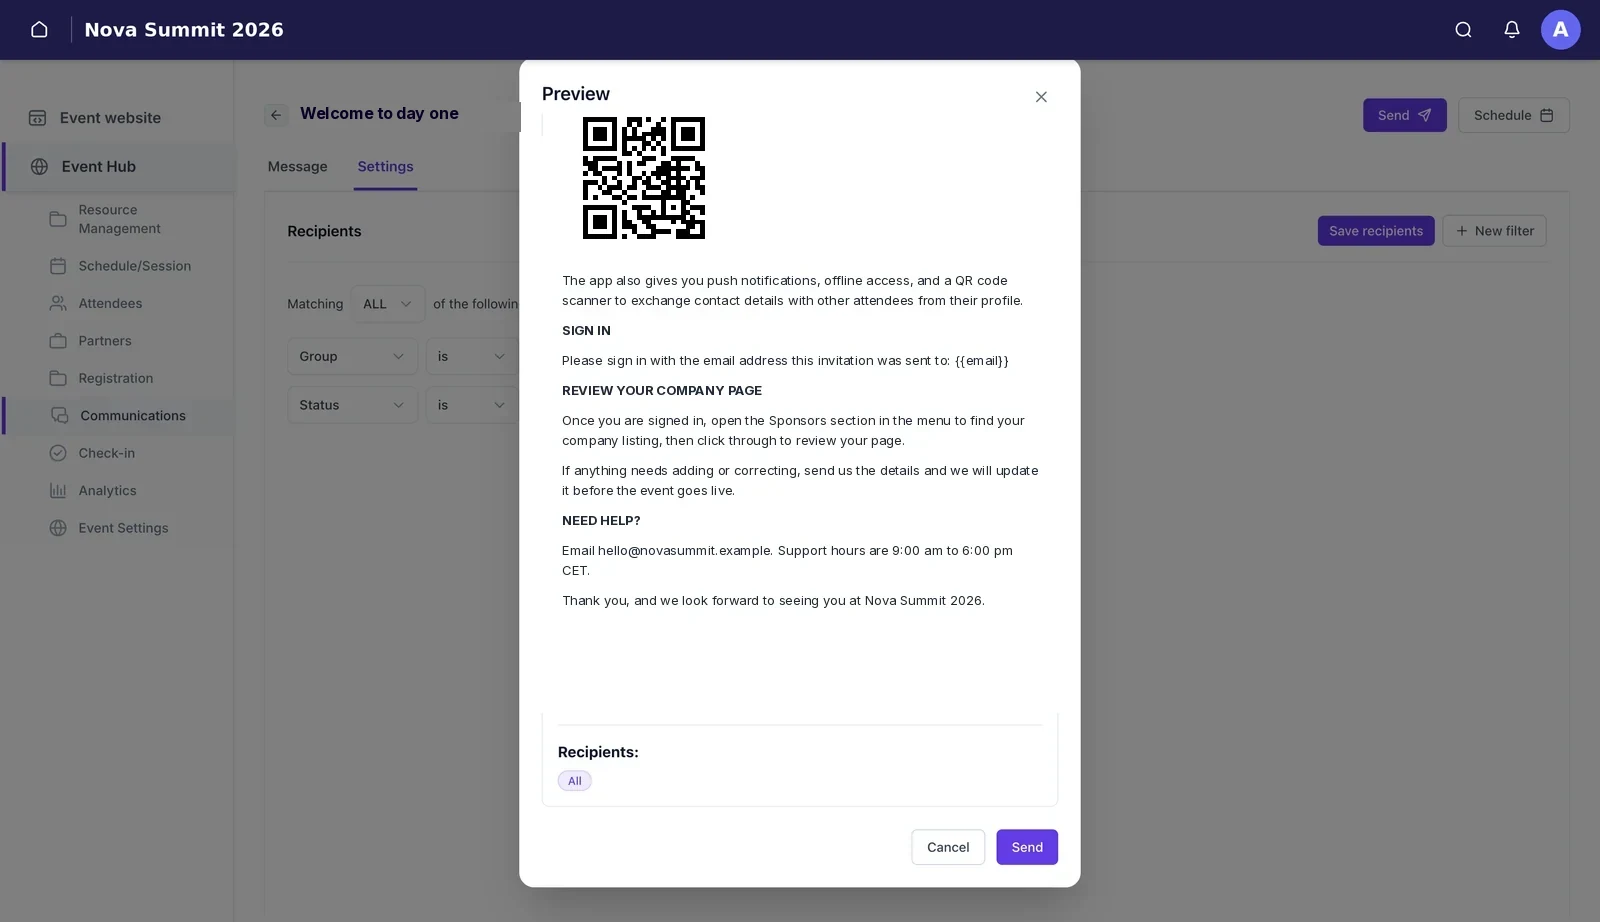
The preview shows the message as it will arrive, with the recipients listed underneath. The review screen repeats the filters back to you. Read them before confirming. ⚠Times follow your event timezone, not the timezone you happen to be sitting in. If you set that up when the event was created, a 10:00 send means 10:00 at the venue. -
Check who actually received it
On a sent broadcast, click the recipients count. That opens the delivery record.
The Received tab, searchable by name or email. 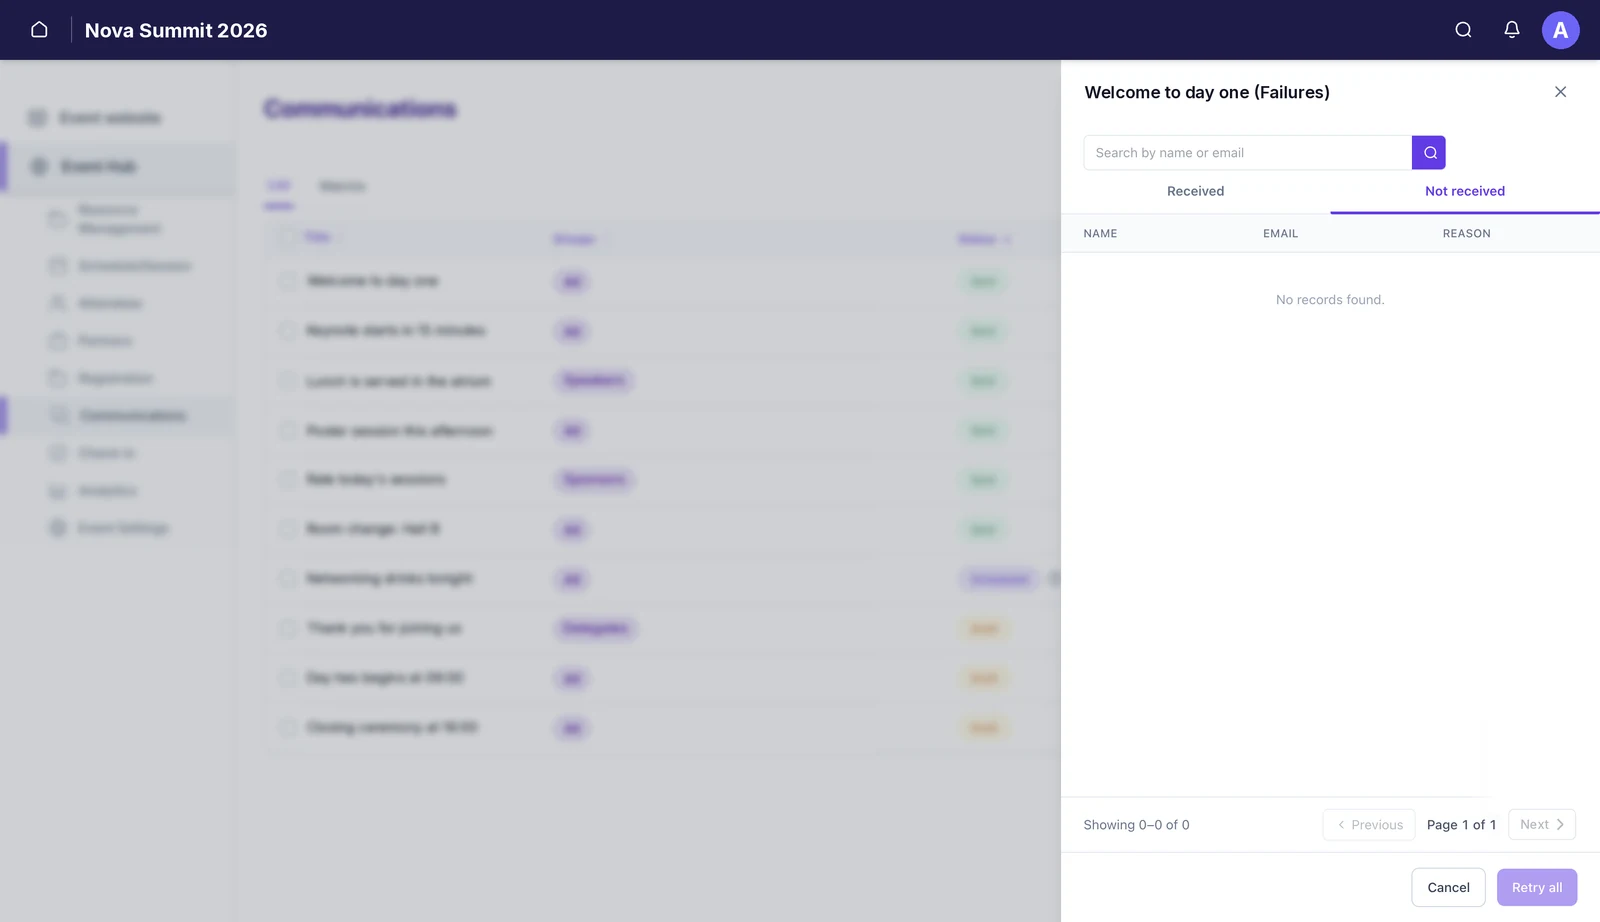
Not received gives a reason per person, and Retry all to try again. This is the part worth using and most people forget. A bounced address, a person who never accepted notifications, an address with a typo — they show up here with a reason rather than silently failing. Fix the address on the attendee record, then Retry all.
A sensible pattern for event day
Most teams end up with a spine of scheduled pushes written before the event and left to fire: a welcome each morning, a lunch call, a prompt to rate yesterday’s sessions, a closing thank-you. Room moves and delays get written on the day and sent immediately.
Writing the predictable ones in advance means the only thing you are composing under pressure is the thing that actually went wrong.
What this isn’t
- It is not automated. Broadcasts are written and sent, or written and scheduled, by a person. There are no triggered sends that fire when somebody registers or checks in.
- It is not a conversation. A broadcast goes out; replies do not come back here. Attendee-to-attendee messaging in the app is a separate thing.
- One broadcast is one channel. Email or push, never both from a single broadcast.